Material
Um tube (Ana.br)
Um misted (Elena Dudina)
Mask border
Plugin MurA's Meister
Plugin Flaming Pear
Plugin Virtual Painter (aqui)
1.- Formar gradiente 2 cores do misted - como no print;
2.- Abrir transparência 1000x600px - preencher com a gradiente;
3.- Magic Wand - selecionar cor sólida - deletar - select none;
4.- Effects - distortion - Warp - Center - H (-47) V 7 - Settings - 94, 35;
5.- Effects - Geometric Effects - Cylinder Vertical - Strength 100;
6.- Effects - Reflection - Rotating Mirror - H 0 - Rotation 0 - Reflect;
7.- Effectrs - Polar Coordinates - Rectangular to Polar - Transparent;
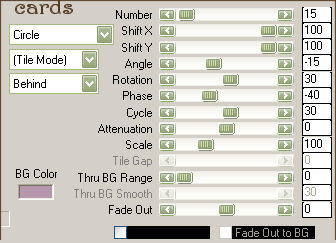
8.- Plugin MurA's Meister - Copies - print abaixo;
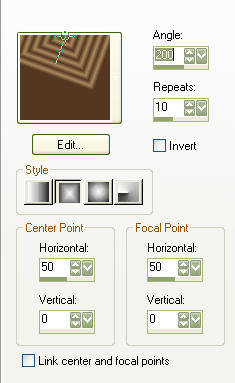
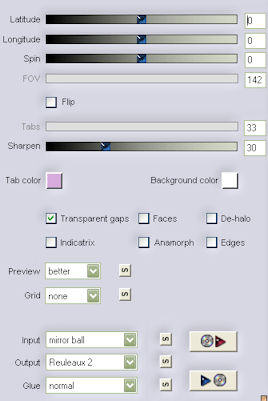
9.- Plugin - Flaming Pear - Flexify 2 - configuração abaixo;
10.- Effects - Image Effects - Offset - H (-680) - V 0 - custom - Transparent;
11.- Effects - Reflection - Rotating Mirror - H 0 - Rotation 180 - Reflect;
12.- Effects - Image Effects - Seamless Tiling - Corner - Vertical - 0, 50;
13.- Magic Wand - Selecionar a transparência central;
14.- Selection - Modify - Expand - 3px;
15.- Ativar o misted - copiar e colar dentro da seleção;
16.- Selection - Invert - Drop Shadow - 0, 0, 80, 40, preto - select none;
17.- Layers - Add New Layer - Send to Bottom - preencher cor sólida mais escura da gradiente;
18.- Layers - Mergir Visível - Canvas size - 1000x700px - 100px no bottom;
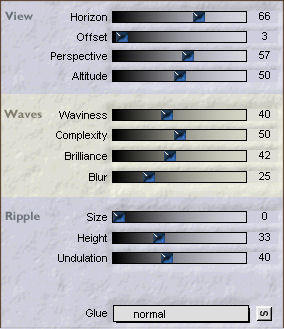
19.- Plugin - Flaming Pear - Flood - print abaixo (mudar a cor se necessário);
20.- Ativar o tube principal - aplicar mask border - merge group;
21.- Copiar o tube - colar no centro - como no modelo;
22.- Layers - Merge Visível - Aplicar mask border - layers merge group;
23.- Layers - Add New Layer - Send to Bottom - preencher com a cor escura da gradiente;
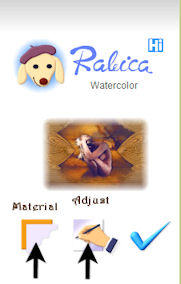
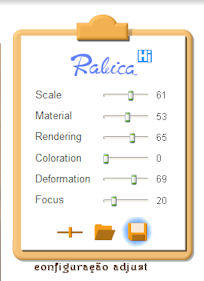
24.- Layers - Merge Visível - Plugin - Virtual Painter - Filter - Watercolor - material - Pastel
Paper - SEGUIR NOS PRINTS ABAIXO AS CONFIGURAÇÕES DO MATERIAL E ADJUST.
25.- Ferramenta seleção - retangular - traçar seleção como no print;
26.- Effects - Texture effects - blinds - 5, 100, H e Light - clicados - cor clara;
27.- Drop shadow - 0, 0, 80, 40, preto - select none;
28.- Repetir o item 24 - Virtual painter;
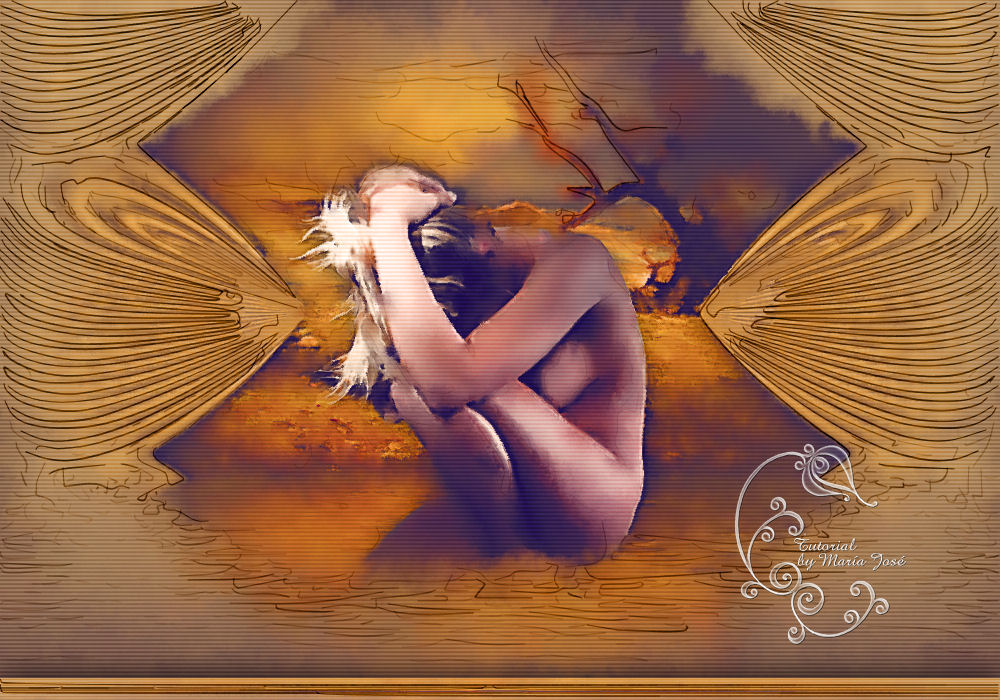
29.- Select none, assinar - salvar em .jpg
Este tutorial foi criado e publicado em 22 de maio de 2010 por Maria José Prado. É protegido por lei de Copyright e não poderá ser copiado, retirado de seu lugar, traduzido ou utilizado em listas de discussão sem o consentimento prévio e escrito de sua autora acima declinada.