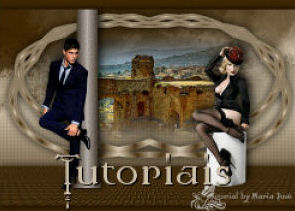
TOP SÉDUCTION
MATERIAL
Um misted (Luz Cristina)
Um tube femme (Tocha - By Tony)
Um tube hommem (Tocha - by Tony)
Script Scriptnubes002-ketpsp9.PspScript_1.PspScript (aqui)
Tube Poste (aqui)
Plugin Photoeffex
Plugin MurA's Meister
1.- Fomrar uma gradiente, Rectangular, A 0, R 10,50, 50, 50, 50, Link clicado, com 2 cores do misted;
2.- Abrir transparência, 1000x650px, preencher com a gradiente;
3.- Com a ferramenta Pick, diminuir a imagem como abaixo;
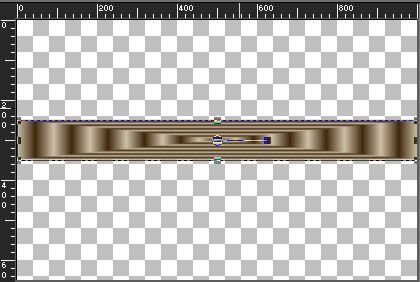
4.- Effects, Distortion Effects, Wave, 1, 50, 20, 100, Repeat;
5.- Layers, Duplicate, Image Flip, mergir visível;
6.- Image, resize 80%, all layers, desclicado;
7.- Effects, Image Effects, Offset, H (-100), V 150, Custom e transparente, clicados;
8.- Effects, Refliction Effects, Rotating Mirror, H 0, Rotating 180, Reflect;
9.- Image, resize 80%, all layers, desclicado;
10.- Effects, Image Effects, Offset, H (-100), V 70, Custom e transparente, clicados;
11.- Effects, Refliction Effects, Rotating Mirror, H 0, Rotating 180, Reflect;
12.- Image, resize 80%, all layers, desclicado;
13.- Effects, Image Effects, Offset, H (-100), V 70, Custom e transparente, clicados;
14.- Effects, Refliction Effects, Rotating Mirror, H 0, Rotating 180, Reflect;
15.- Image Flip, Effects, Distortion, Polar Coordinates, Retangular to Polar, Transparente;
16.- Image, Flip, Image, resize 80%, all layers, desclicado;
17.- Effects, Image Effects, Offset, H (-100), V 70, Custom e transparente, clicados;
18.- Effects, Refliction Effects, Rotating Mirror, H 0, Rotating 180, Reflect;
19.- Com a Magic Wand, Selecionar as transparências interiores;
20.- Ativar o Misted, copiar e colar dentro da seleção, select none;
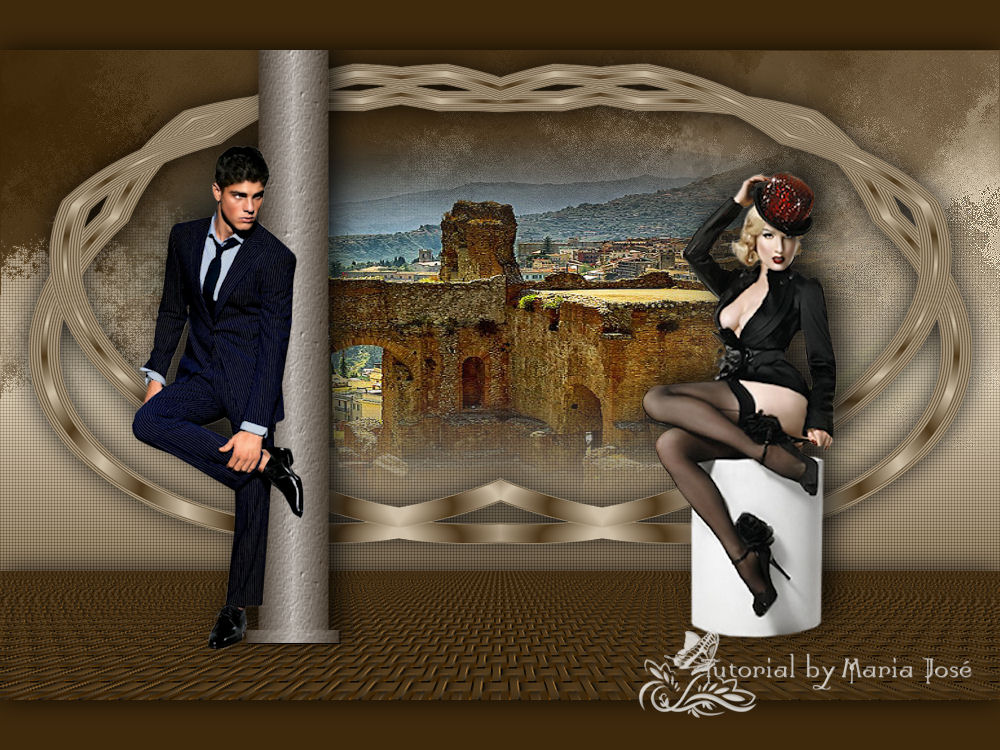
21.- Effects, 3DEffects, drop shadow, 0, 0, 80, 40, preto;
22.- Layers, Add New Layer, Move down, Rodar o Script Scriptnubes002-ketpsp9.PspScript_1.PspScript;
23.- Layers, Add New Layer, Arrange, Send to Bottom, preencher com a gradiente, Linear, A 0, R 1;
24.- Effects, Texture Effects, Weave, 10, 10, 60, Cores de acordo com o top, Fill clicado;
25.- Plugin, MurA's Meister, Perspective Tiling, 80, 0, 0, 20, 0, 0, 100, 255;
26.- Emboss3, Drop shadow, 0, 0, 80, 40, preto;
27.- Layers, Add New Layer, Arrange, Send to Bottom, preencher com a gradiente, Linear, A 0, R 1;
28.- Plugin, Photoeffex, Scanlines, uma vez Vertical e outra Horizontal, demais itens como aparecem;
29.- Ativar os tubes, copiar e colar como no modelo, drop shadow como gostar;
30.- Layers, merge all flatten, assinar e salvar em .jpg.
Este tutorial foi criado e publicado em 02 de setembro de 2010 por Maria José Prado. É protegido por lei de Copyright e não poderá ser copiado, retirado de seu lugar, traduzido ou utilizado em listas de discussão sem o consentimento prévio e escrito de sua autora acima declinada.