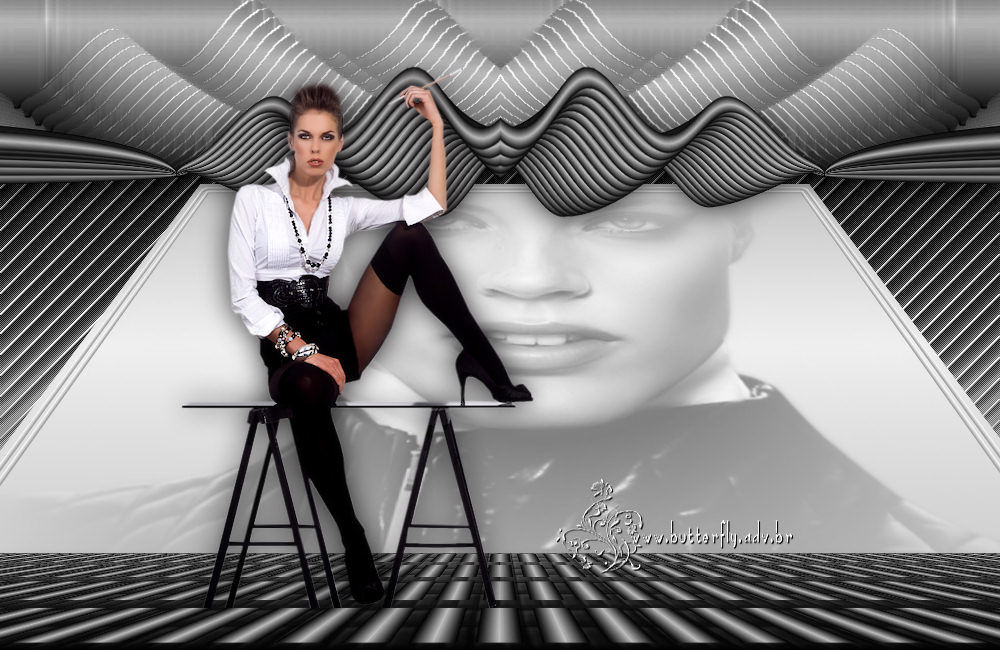
TOP LA POSEMaterial
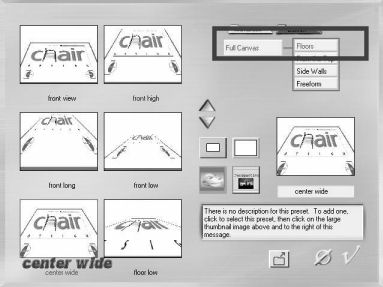
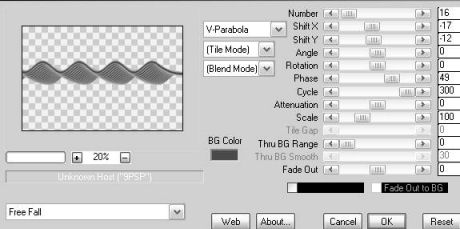
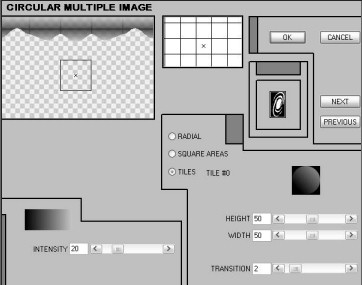
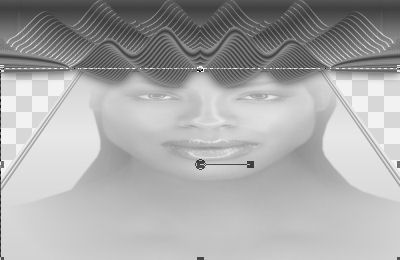
1.- Abrir uma transparência 1000x650px; 2.- Preencher com gradiente, linear, A 0, R 1, cor clara central, opacidade 50; 3.- Selection select all, copiar e colar o tube face, dentro da seleção; 4.- Selection, modify, contract 25; 5.- Effects, 3Deffects, chisel, 6, transparente, cor escura; 6.- Selection, modify, expand 10px, repetir o chisel, select none; 7.- Baixar a opacidade para 50%, merge all, em seguida promote background em layer; 8.- Aplicar Plugin Andromeda Perspective, como no print; 9.- Layers, add new layer, preencher com a gradiente, invert clicado, opacidade 100; 10- Geometric effects, perspective horizontal, transparente, 95; 11.- Repetir o item anterior com -95; 12.- Distortion effects, Pinch 100, Tirar a visibilidade da layer 1; 13.- Distortion effects, wave, H 0, 100, V 5, 23, Repeat; 14.- Plugin MurA's Meister, copies, como no print; 15.- Geometric Effects, circle, repeat; 16.- Reflection, rotating mirror, H 0, rotating 180, reflect; 17.- Image effects, offset, H 0, V 150, transparente; 18.- Com a magic wand, selecionar a parte superior transparente; 19.- Selection, modify, expand 3px; 20.- Layers, add new layer, preencher com a mesma gradiente; 21.- Layers, arrange, move down, select none; 22.- Plugin Andromeda, cMulti, como no print; 23.- Emboss 3 e repetir o MurA's copies e rotating mirror, como acima; 24.- Layers, mergir visível, drop shadow 0, 0, 80, 40, preto; 25.- Tirar a opacidade da layer 1; e ativar a layer 1; 26.- Ferramenta Pick, diminuir a altura da imagem como no print abaixo; 27.- Layers, add new layer, preencher com a gradiente cor clara central; 28.- Effects, texture effects, tiles, square, tile size 15, branco; 29.- Plugin MurA's Meister, Perspective Tiling, 63, 50, 0, 15, 0, 0, 99, 255; 30.- Ativar a imagem pizo, copiar e colar no trabalho(colorir de acordo); 31.- Repetir o item 29 - Perspective Tiling; 32.- Drop shadow 1, 1, 100, 1, preto, repetir, -1, -1; 33.- Layers, add new layer, arrange, send to bottom; 34.- Preencher com a gradiente; 35.- Plugin Funhouse, Angulate, Intensity 80, demais como estão, Emboss3; 36.- Layers, mergir visível; 37.- Ativar o tube, copiar e colar como gostar, drop shadow a gosto; 38.- Layers, merge all flatten, assinar e salvar em JPG. Este tutorial foi criado e publicado em 14 de novembro de 2009 por Maria José Prado. É protegido por lei de Copyright e não poderá ser copiado, retirado de seu lugar, traduzido ou utilizado em listas de discussão sem o consentimento prévio e escrito de sua autora acima declinada. |