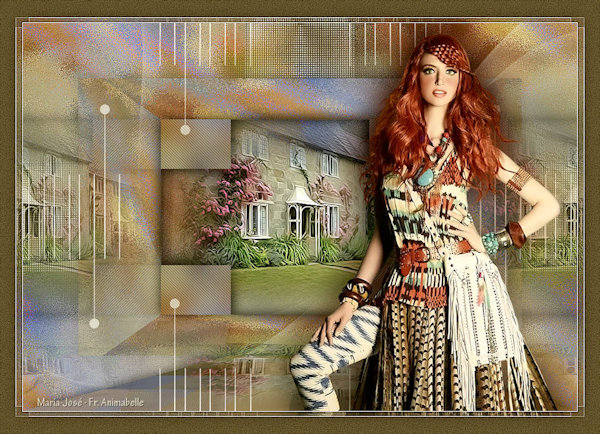
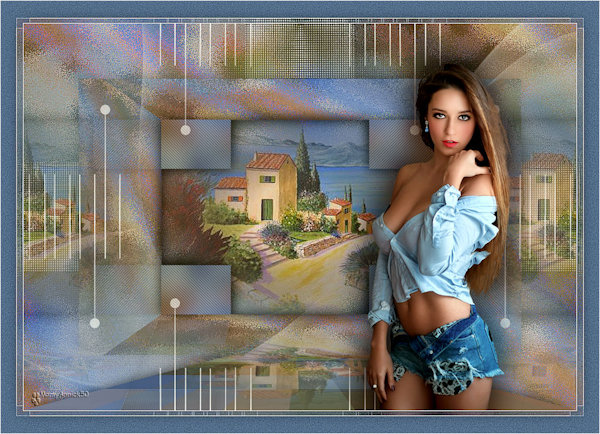
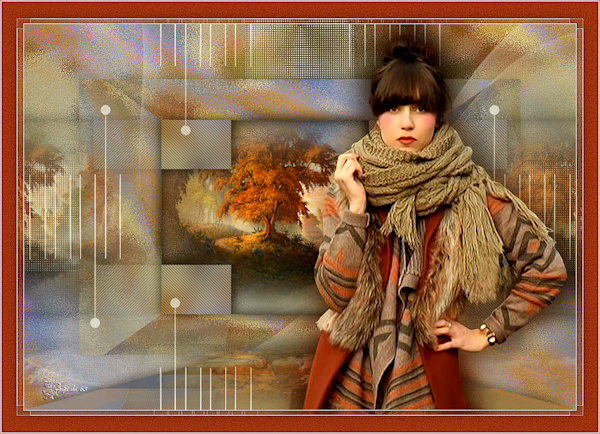
MATERIAL 
Um gráfico - textura_4_mj
Um misted - MJ
Um tube - Colybrix, agradeço
Uma mask - MJ
Deco - MJ
Seleção
*** Salvar a seleção na pasta Selections do PSP
Preset Eye Candy
*** Dois cliques sobre o preset ele se instalará
Preset Pick
*** Salvar dentro da pasta Presets do PSP
PLUGINS
(AFS IMPORT)
Alf's Border FX
Filters Unlimited 2
AP [Lines] SilverLining
Eye Candy 5 - Impact
FM Tile Tools
Filter Factory Gallery "J"
OPCIONAL - Plugin AAAFilters
______________________________________________________________________
1.- Abrir o gráfico - textura_4_mj - Edit copy
2.- Abrir transparência -1000x700px- Selections - Select All
Edit coplar dentro da seleção a imagem copiada no item 1
______________________________________________________________________
3.- Selections - Modify - Contract 100 - Select Invert
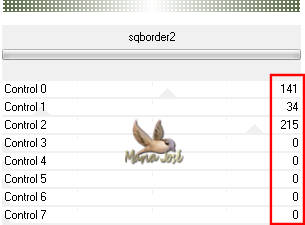
4.- Plugin - (AFS IMPORT) - sqborder2 - DEFAULT
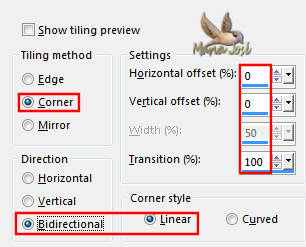
5.- Selections - Invert - Effects de Image - Seamless Tiling - DEFAULT - transition 100
6.- Effects - 3DEffects - Drop Shadow 0, 0, 60, 30, preto
7.- Selections - Promote Selection to Layer - DESELECIONAR
______________________________________________________________________
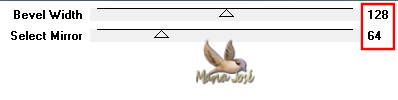
8.- Plugin - Alf's Border FX - Mirror Bevel - DEFAULT
9.- Selections - Lod Selection from Disk - selection_mj
Promote Selection to layer
10.- Adjust - Blur - Gaussian Blur - Radius 30,00 - DESELECIONAR
______________________________________________________________________
11.- Filters Unlimited 2 - Tile & Mirror - Mirrored Scaled
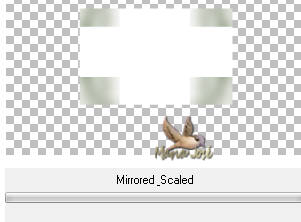
Ferramenta - Magic Wand-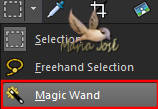 - Selecionar o branco - DELETAR
Selections - Invert
12.- Plugin - AP [Lines] SilverLining - V-shaped
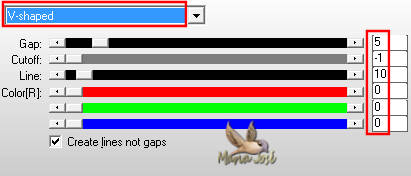
Selections Invert
______________________________________________________________________
13.- Layers - Add New Layer - Layers - Arrange - Move Down
14.- Edit - Copiar/Colar dentro da seleção o misted
Drop Shadow 0, 0, 60, 30, preto
Selections Invert - Repetir o Drop Shadow - DESELECIONAR
______________________________________________________________________
15.- Ativar a Layer Superior - Promoted Selection 1
Layers - Merge Down
Repetir o Drop Shadow
______________________________________________________________________
16.- Eye Candy 5 - Impact - Perspective Shadow - preset renee_2
Layers - Duplicate
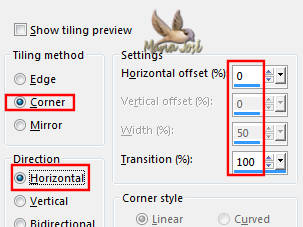
17.- Effets - Image Effects - Seamless Tiling - Corner Horizontal - Transition 100
Layers - Move Down - Baixar a opacidade para 60%
______________________________________________________________________
Ativar a Raster 1
18.- Effects de Image - Seamless Tiling - DEFAULT - transition 100
Layers - Duplicate
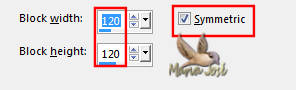
19.- Effects - Distortion Effects - Pixelate - Symmetric clicado
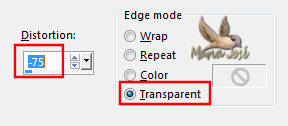
20.- Effects - Geometric Effects - Perspective Vertical - Transparent clicado
21.- Ferramenta Pick-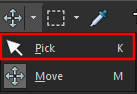 - tecle letra K
Preset renee - para reduzir a imagem
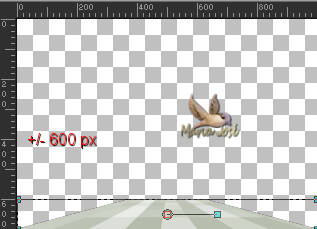
Desabilitar a ferramenta - tecle letra M
Drop Shadow na mesma configuração - Layers - Move Up
______________________________________________________________________
22.- Layers - Add New Layer - Layers Arrange - Move Down
Preencher com branco - Opacidade 60%
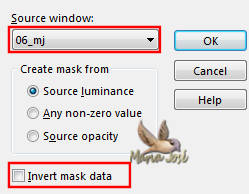
23.- Layers - New Mask Layer - From Image 06_mj
Layers - Merge Group
24.- Plugin - FM Tile Tools - Blend Emboss - DEFAULT
Baixar a opacidade para 80%
______________________________________________________________________
25.- Edit - Copiar/Colar como nova layer - deco_renee_mj
Layers - Arrange Bring to Top - Blend Mode - Screen
26.- Effects - Image Effects - Offset - H 0, V 9

27.- Effects de Image - Seamless Tiling - DEFAULT - transition 100
______________________________________________________________________
28.- Edit - Copiar/Colar o tube principal - posicionar como no modelo ou a seu gosto
Layers - Duplicate - Blur - Guassian Blur - Radius 30,00
Layers - Move Down - Blend Mode - Multiply
______________________________________________________________________
LAYERS

LAYERS - Merge Visible
______________________________________________________________________
29.- Image - Add Borders - 1px - branco
Selections - Select All
30.- Image - Add Borders - 40px - escolher uma cor do seu trabalho
Drop Shadow mesma configuração
______________________________________________________________________
31.- Selections - Invert - Selections Float
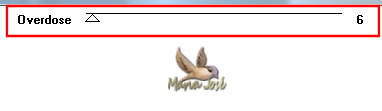
32.- Plugin - Filter Factory Gallery "J" - Drink To Me
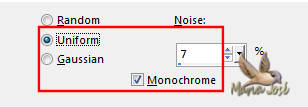
33.- Adjust - Add Noise - Uniform - 7 - Mono clicado
Adjust - Sharpness - Sharpen More - DESELECIONAR
______________________________________________________________________
34.- Image - Add Borders - 1px - branco
35.- Assinar o trabalho - Layers - Merge All Flatten
36.- Image - Resize - Width 1000px - Salvar em .jpg
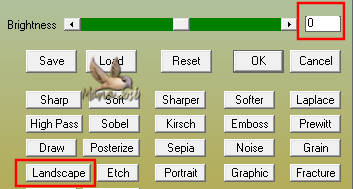
OPCIONAL - Plugin AAAFilters - Custom - Landscape
Espero que apreciem, obrigada
______________________________________________________________________
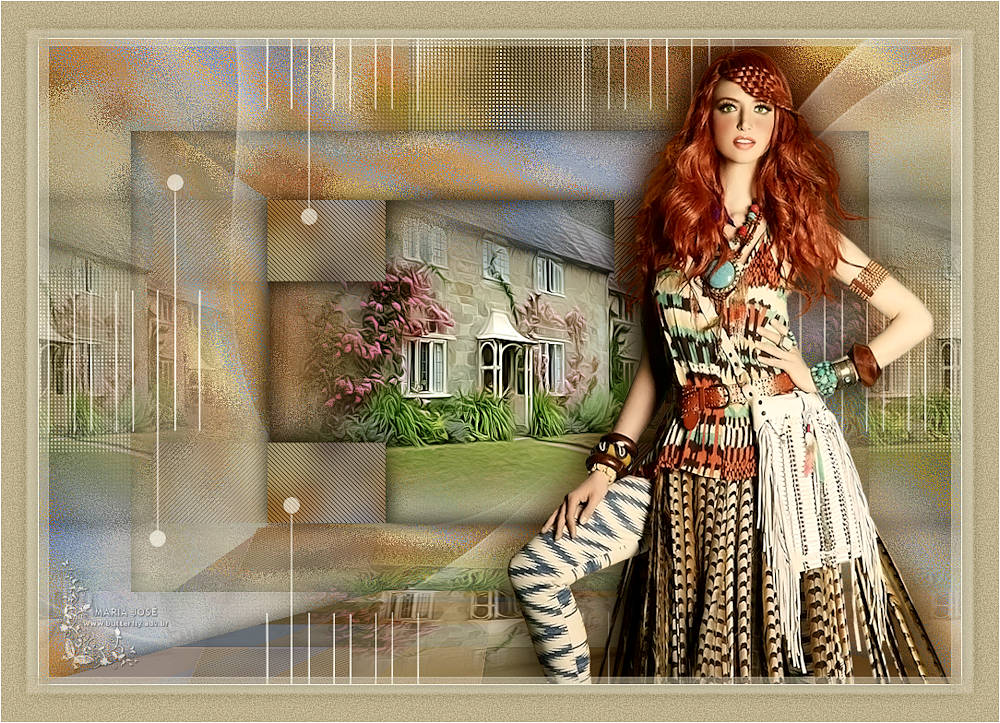
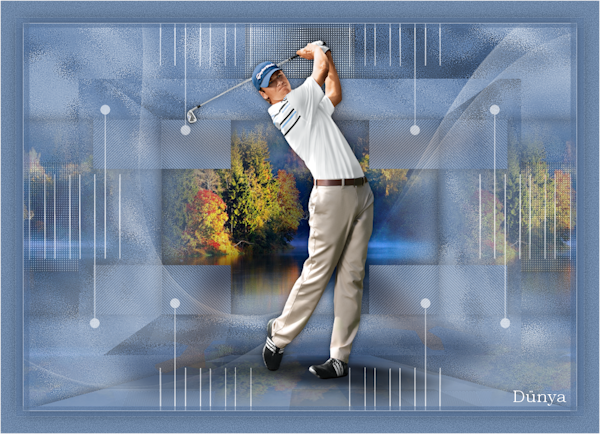
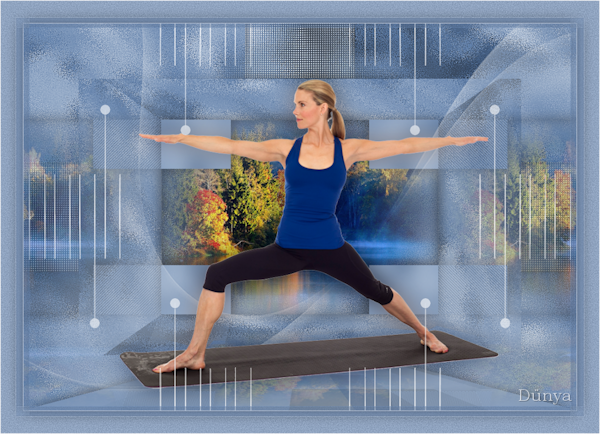
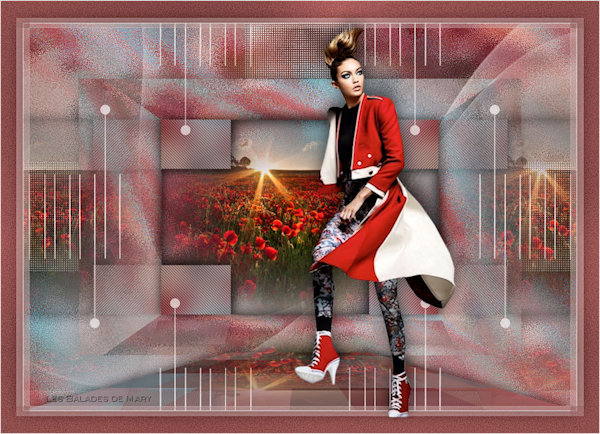
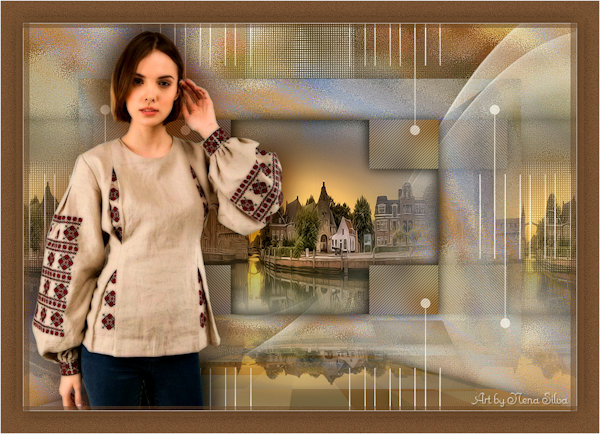
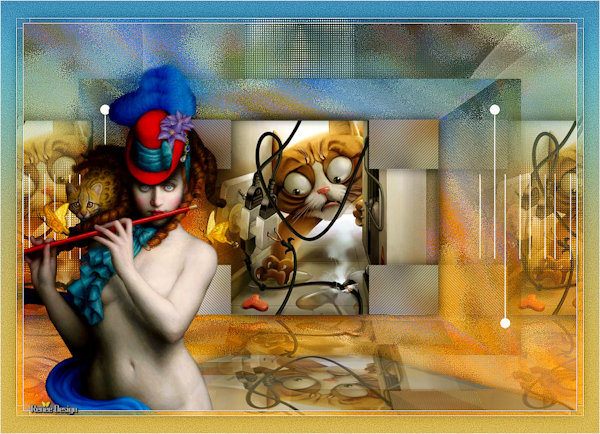
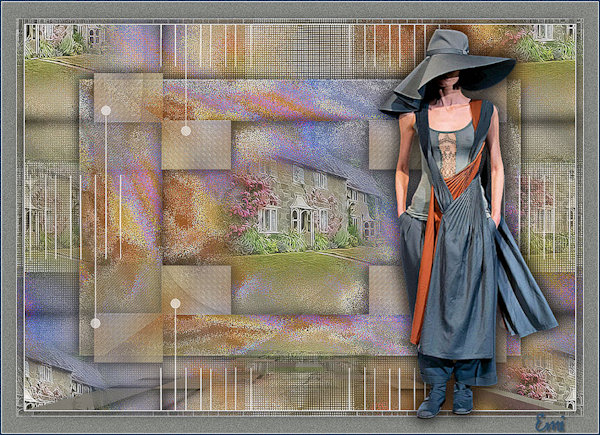
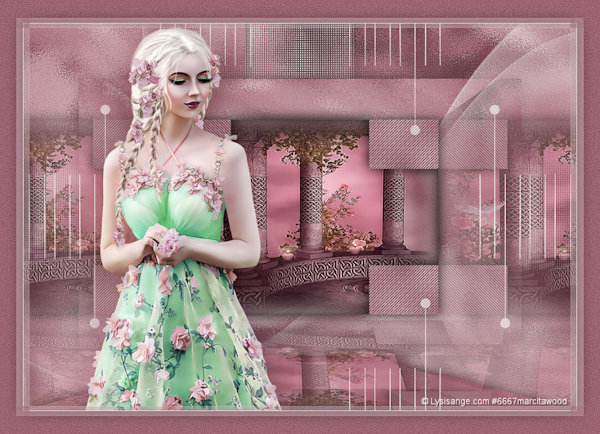
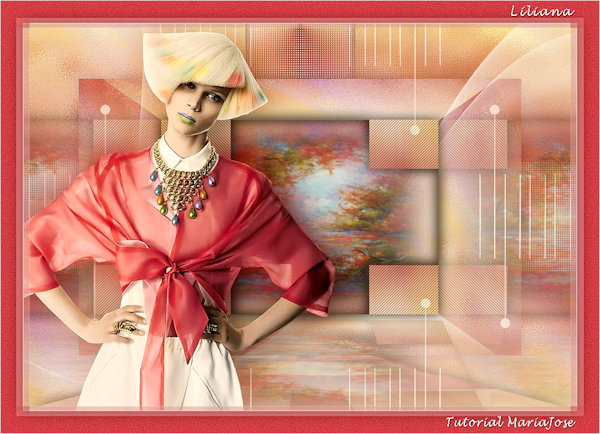
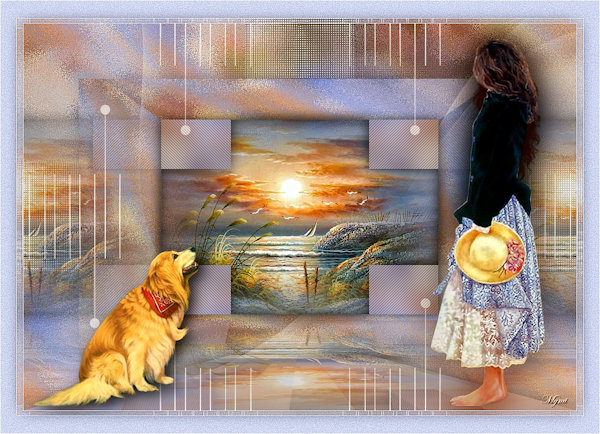
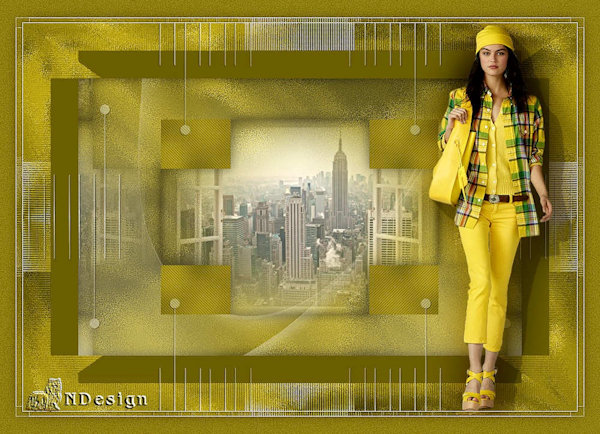
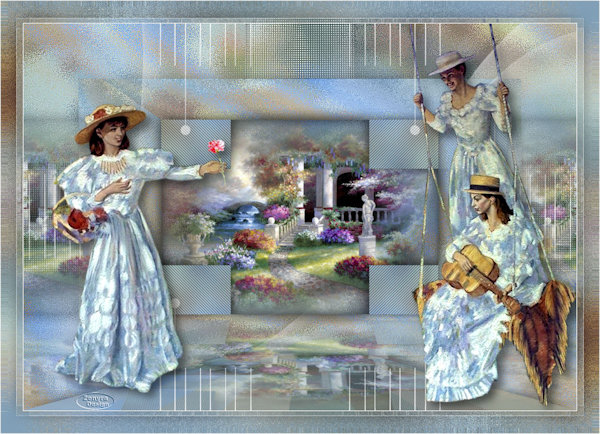
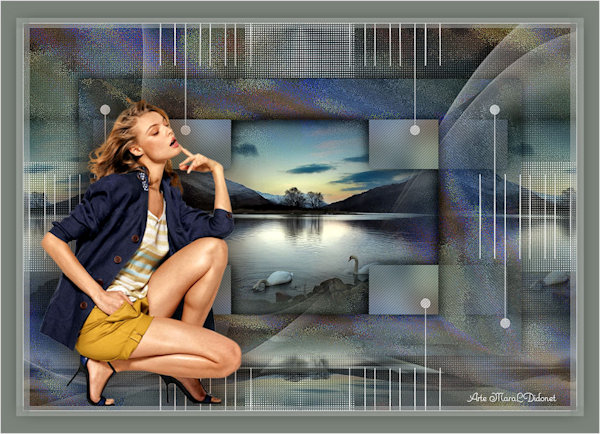
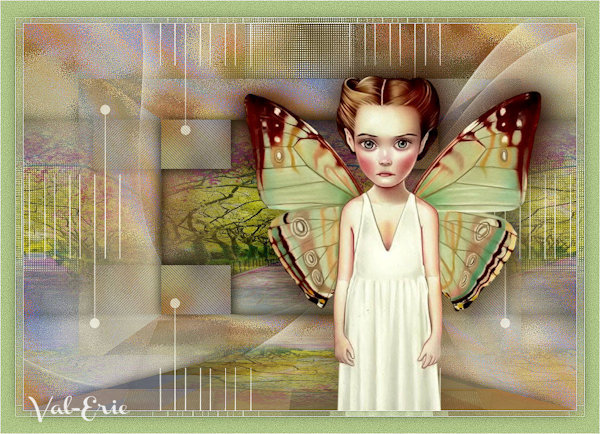
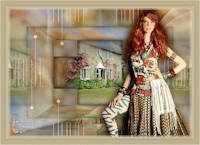
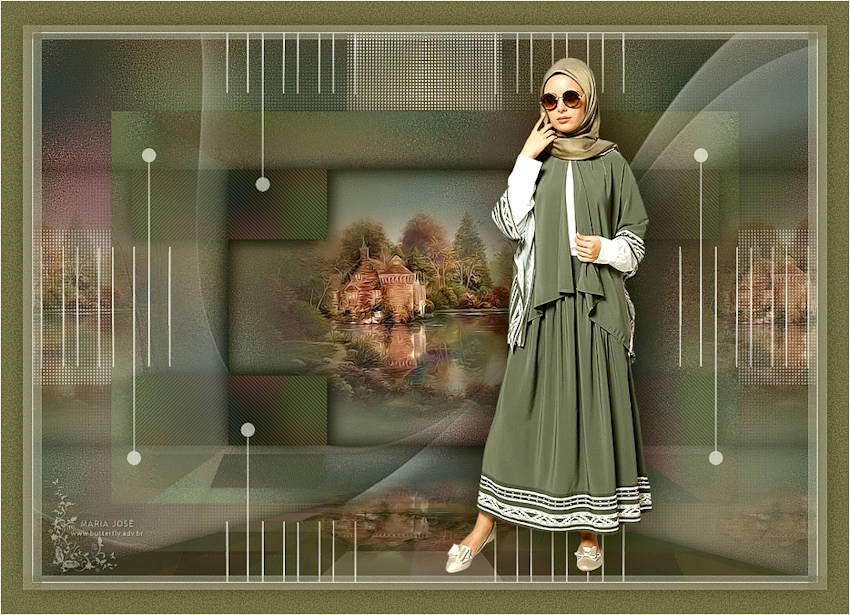
Outro modelo - tube e misted MJ

Este tutorial foi criado em 06 de abril de 2018 por Maria José Prado. É protegido por lei de Copyright e não poderá ser copiado, retirado de seu lugar, traduzido ou utilizado em listas de discussão sem o consentimento prévio e escrito de sua autora acima declinada.
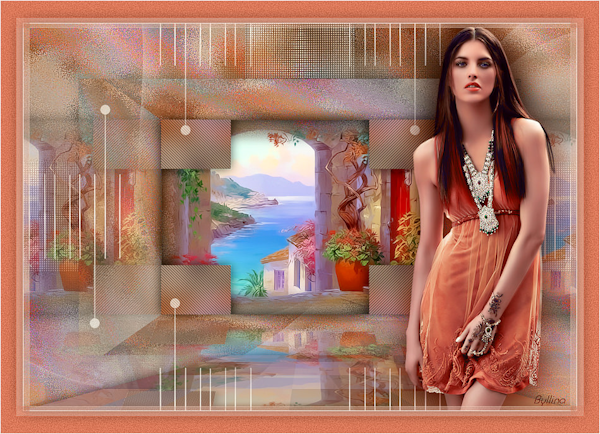
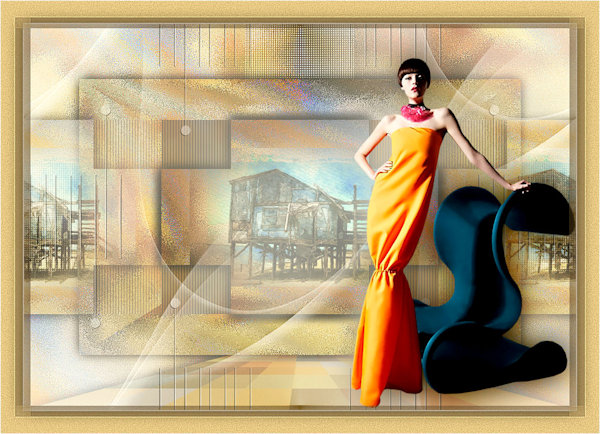
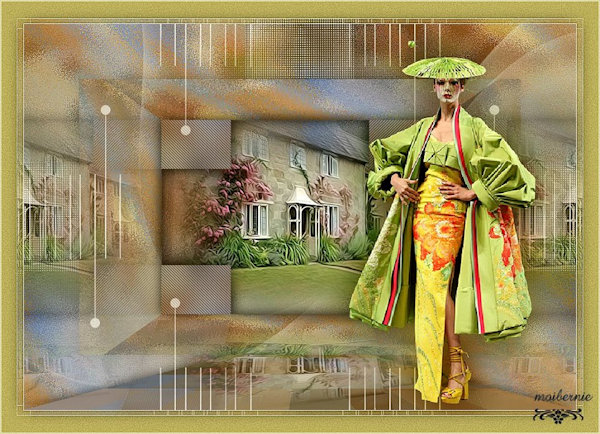
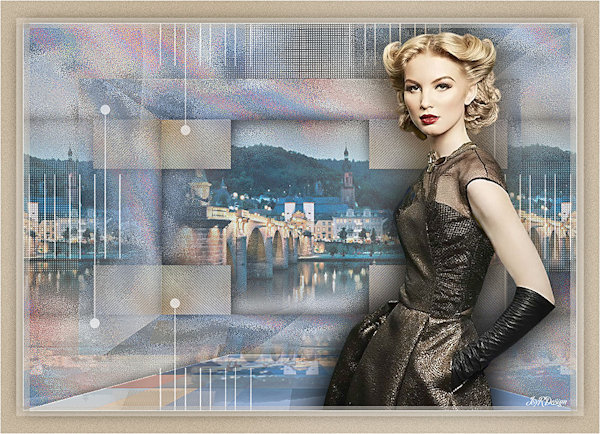
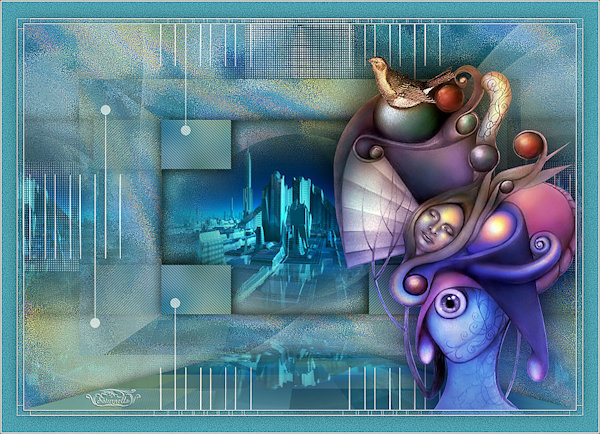
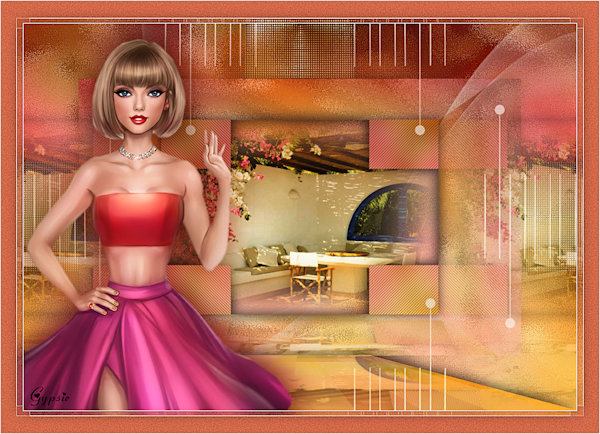
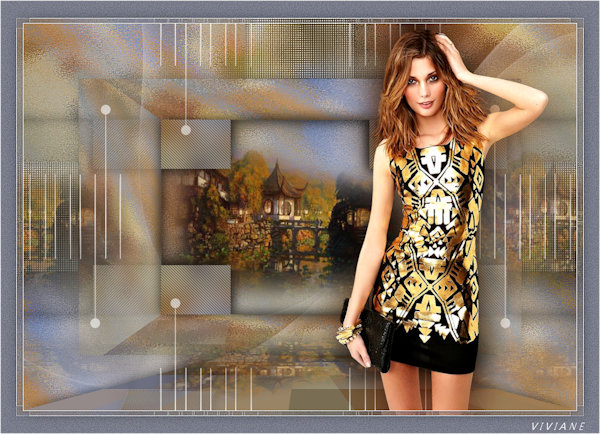
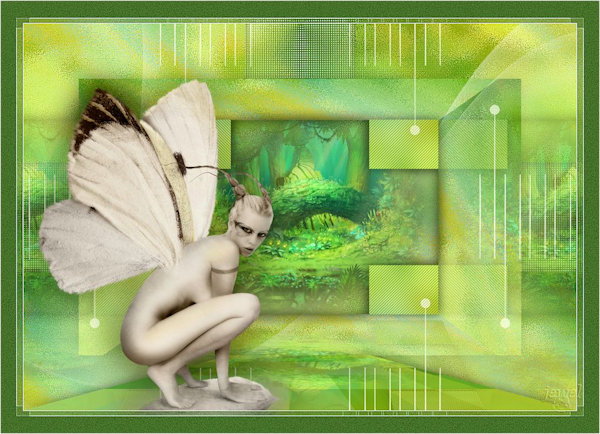
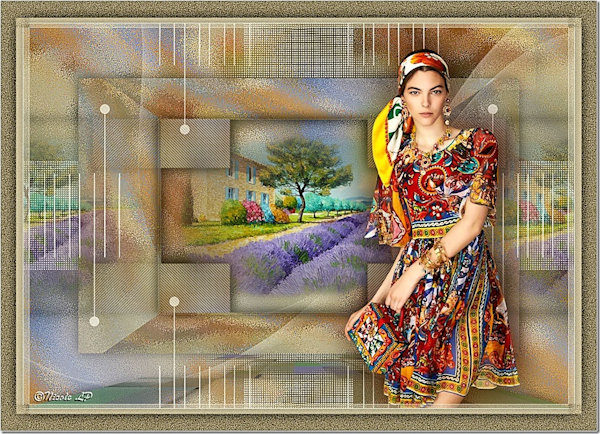
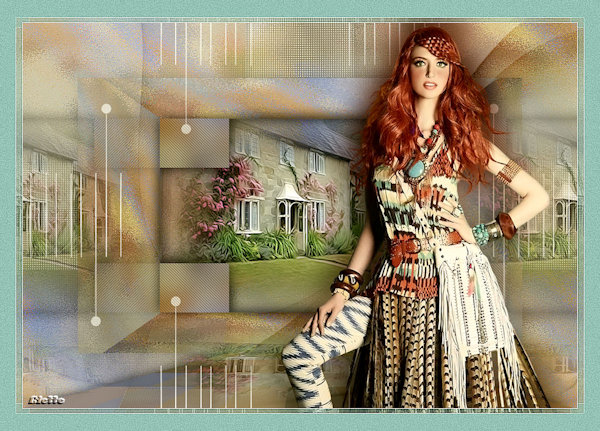
VARIANTES