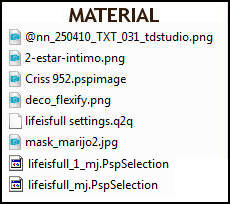
Tubes - Criss and Nadège, thank you
PLUGINS
Flaming Pear
*Kiwi*
Filters Unlimited2 - BKg Designer sf10 II
Graphics Plus
MuRa's Seamless
AAA Filters - OPTIONAL
____________________________________________________________________________________
Choose two colors to your liking
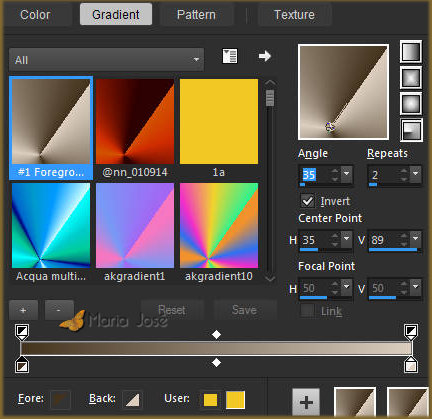
Prepare Gradient for Foreground - RADIAL - Angle 35 - Repeats 2
* Center Point - H 35 - V 89
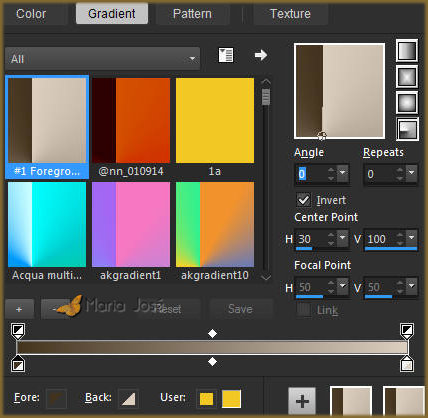
Prepare Gradient for Background - RADIAL - Angle 0 - Repeats 0
*Center Point - H 30 - V 100
Colors of this tutorial - Foreground- - # 43331e - Background-
 - #dbcebf
____________________________________________________________________________________
1.- Layers - New Raster Layer - Transparent - 1000x700px
* Fill with gradient - FOREGROUND
2.- Layers - Add New Layer - fill with gradient - BACKGROUND
* Blend Mode - Multiply - Layers - Merge Visible
____________________________________________________________________________________
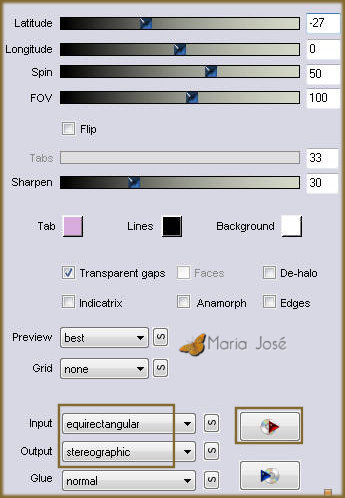
3.- Plugin - Flaming Pear - Flexify - preset lifeisfull settings - with the material
4.- Layers - Duplicate - Image Flip Vertical - Image Mirror Horizontal
* Opacity to 50% - Layers - Merge Visible
____________________________________________________________________________________
5.- Selections - Load Selection from Disk - lifeisfull_mj
6.- Layers - Add New Layer - Drop Shadow 0, 0, 60, 60, black
SELECT NONE
7.- Layers - Duplicate - Image Flip Vertical - Image Mirror Horizontal
* Layers - Merge Down
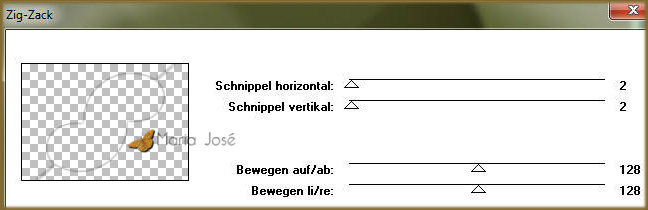
8.- Plugin - * Kiwi * - Zig-Zack - DEFAULT
* Adjust - Sharpness - Shapen More
____________________________________________________________________________________
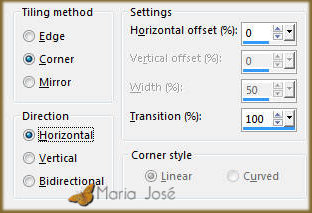
9.- Effects - Image Effects - Seamless Tiling - Corner - Horizontal - Transition 100
Enable Layer Merged - Repeat the previous (item 9)
____________________________________________________________________________________
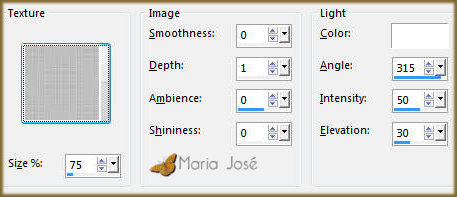
10.- Effects - Texture Effects - Texture - with material
* Adjust - Sharpness - Shapen More
____________________________________________________________________________________
11.- Selections - Load Selection from Disk - lifeisfull_1_mj
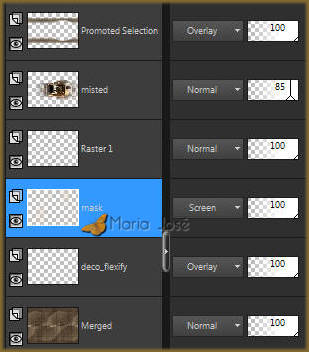
* Promote Selection to Layer - Arrange Layers - Bring to Top
* Take the Visibility of Raster 1 and Layer Merged
12.- Adjust - Blur - Gaussian Blur - Radius 30,00
SELECT NONE
____________________________________________________________________________________
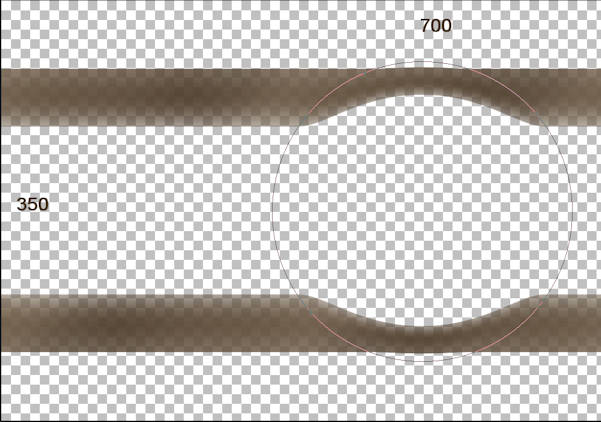
13.- Warp Brush Tool-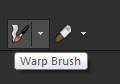 - configuration below - see template

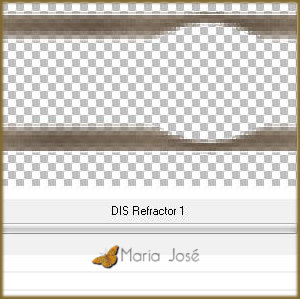
14.- Filters Unlimited2 - BKg Designer sf10 II - DIS Refractor 1
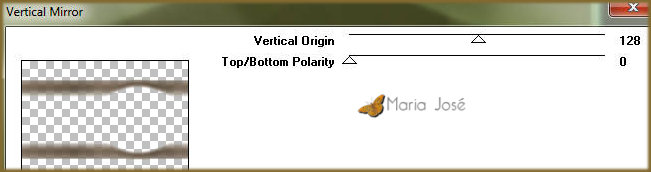
15.- Plugin - Graphics Plus - Vertical Mirror - DEFAULT
* Make visible layers (merged and raster1)
* Blend Mode - Overlay or other
____________________________________________________________________________________
16.- Magic Wand tool - select transparency
* Selections - Modify - Expand 5 px
17.- Edit - Copy / Paste as new layer o misted
18.- Selections - Invert - DELETE - SELECT NONE - Layer Move Down
* Opacity to +/- 85% (if necessary)
____________________________________________________________________________________
19.- Edit - Copy / Paste as new layer - deco_flexify
* Blend Mode - Overlay - Layers - Move Down 2 times
20.- Layers - Add New Layer - fill with light color
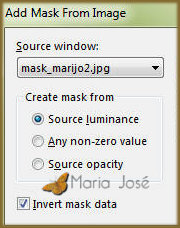
21.- Layers - New Mask Layer - from image - mask_marijo2
* Layers - Merge Group
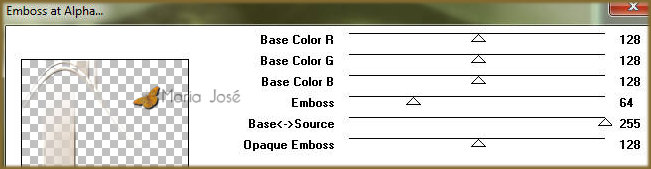
22.- Plugin - MuRa's Seamless - Emboss at Alpha - DEFAULT
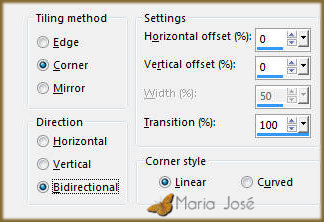
23. Effects - Image Effects - Seamless Tiling - DEFAULT - Transition 100
* Blend Mode - Screen
____________________________________________________________________________________
LAYERS - Blend Mode and Opacity - Free Choice
Layers - Merge Visible
24.- Plugin - AAA Filters - Custom - Landscape (Optional)
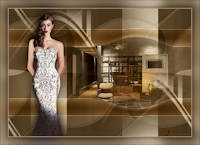
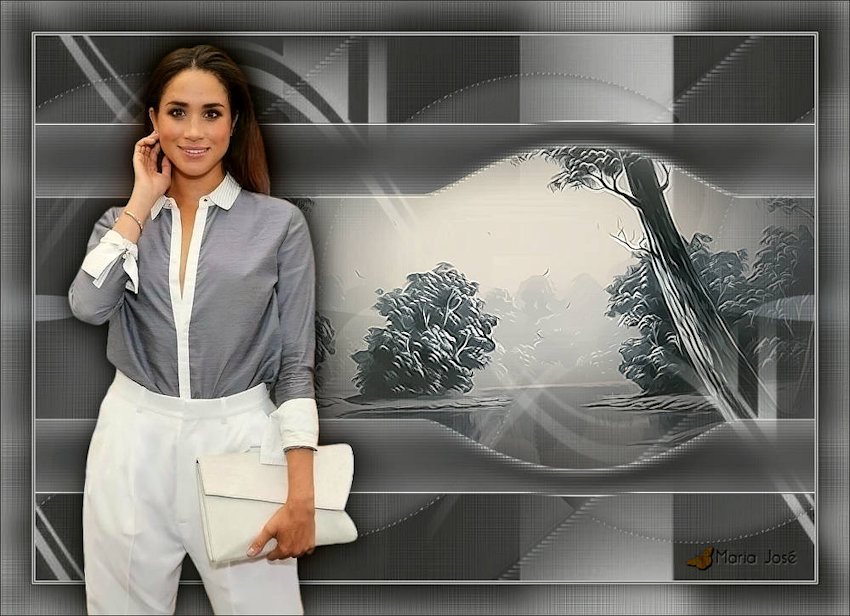
25.- Edit - Copy / Paste the character tube - see model
* Drop Shadow - Personal Criterion
____________________________________________________________________________________
BORDERS
26.- Image - Add Borders - 1px - light color
* Image - Add Borders - 2px - dark color
* Image - Add Borders - 1px - light color
27.- Selections - Select All - EDIT COPY
* Image - Add Borders - 40px - white
28.- Selections - Invert - Paste within the selection the copied image
* Adjust - Blur - Gaussian Blur - Radius 15,00
29.- Effects - Texture Effects - Texture (same setting)
* Sharpness - Sharpen More
30.- Selections - Invert - Drop Shadow 0, 0, 60, 30, black
SELECT NONE
____________________________________________________________________________________
31.- Image - Add Borders - 1px - dark color
32.- Sign your work - Layers - Merge All Flatten
33.- Image - Resize - Width 1000px - Save in .jpg
I hope you appreciate it, thank you.
____________________________________________________________________________________
Another model

This tutorial was created and published on January 1, 2019 by Maria José Prado. It is protected by copyright law and may not be copied, removed from its place, translated or used in mailing lists without the prior written consent of its author declined above.
VARIANTS