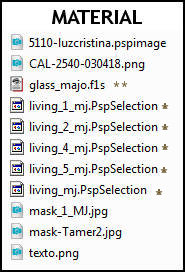
** Two clicks on the present he installed
* Save to PSP Selections folder
Tubes - Luz Cristina and CAL, thank you
Mask - Tamer, thank you
______________________________________________________________________________
PLUGINS
Mehdi
Picture Man Collection Art Gallery
Simple
Toadies
Carolaine and Sensibility
Eye Candy 5 - Impact
AAA Filters
MuRa's Meister
MuRa's Seamless
______________________________________________________________________________
Choose two colors - from the misted, tube or to your liking
Layers - New Raster Layer - Transparent - 1000x700px
Colors of this tutorial - Foreground- - # eae5c8 - Background-
 - # 685630
* If you use other colors, you can change Blend Mode and Opacity for a better result.
1.- Layers - New Raster Layer - Transparent - 1000x700px
______________________________________________________________________________
2.- Plugin - Mehdi - Wavy Lab
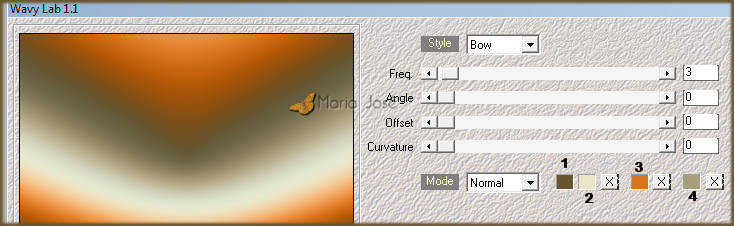
Colors - 1- #6b582d- 2-
 #eae5c8- 3-
 #d8731d- 4-
 #aa9d7b
3.- Adjust - Blur - Gaussian Blur - Radius 30,00
______________________________________________________________________________
4.- Edit - Copy / Paste as new layer o Misted
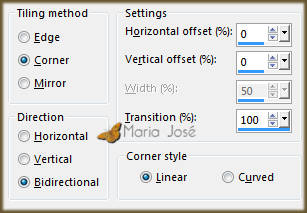
5. Effects - Image Effects - Seamless Tiling - DEFAULT - Transition 100
6.- Adjust - Blur - Gaussian Blur - Radius 15,00
7.- Plugin - Picture Man Collection Art Gallery - Canvas
* Layers - Merge Down
8.- Plugin - Mehdi - Sorting Tiles (Plus 300)

9.- Plugin - Simple 4 Way Average
* Adjust - Sharpness - Sharpen More
______________________________________________________________________________
10.- Selection - Load Selection from Disk - living_mj
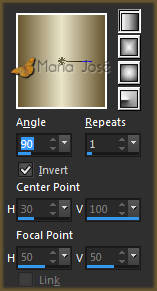
* Add New Layer - fill with gradient - SELECT NONE
11.- Selections - Load Selection from Disk - living_1_mj
* DELETE - SELECT NONE
12.- Plugin - Toadies - What Are You (10,0)

13.- Selection - Load Selection from Disk - living_2_mj
* Add New Layer - fill with gradient
14.- Adjust - Blur - Gaussian Blur - Radius 15,00
15.- Layers - Merge Down - SELECT NONE
16.- Plugin - Carolaine and Sensibility - CS-DLines - DEFAULT
* Adjust - Sharpness - Sharpen More - Blend Mode - Screen
______________________________________________________________________________
17.- Layers - Add New Layer - fill with white
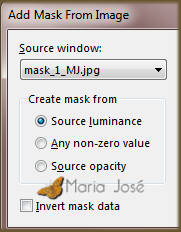
18.- Layers - New Mask Layer - mask_1_MJ
* Layers - Merge Group - Layers - Duplicate - Layers - Merge Down
19.- Image - Resize - 75% - All Layers - UNCHECKED
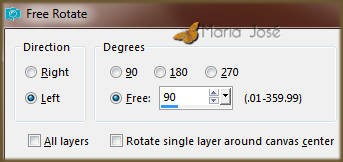
* Image - Free Rotate
20.- Selection - Load Selection from Disk - living_4_mj
* Activate Raster 1 - Selection Promote Selection To Layer
21.- Layers - Layers Arrange - Move Up
22.- Adjust - Blur - Gaussian Blur - Radius 15,00
23.- Layers - Add New Layer - Copy / Paste the misted inside the selection
* Layers - Merge Down
24.- Eye Candy 5 - Impact - Glass - preset glass_majo
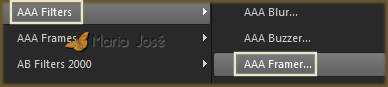
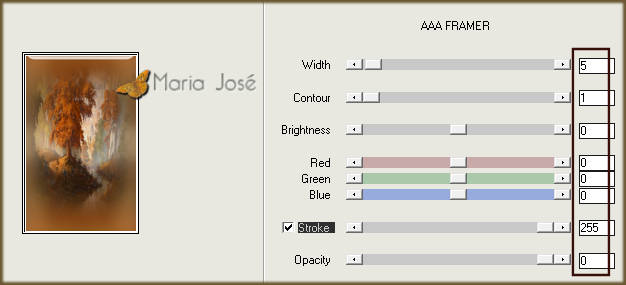
25.- Plugin - AAA Filters - AAA Framer
* Enable - Group Raster 3 - Layers - Merge Down
* SELECT NONE
26.- Image - Resize 40% - All Layers - UNCHECKED
27.- Effects - Image Effects - Offset - H (-300) - V 157
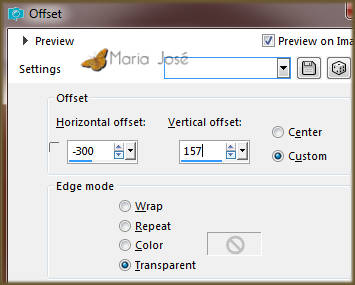
* Adjust - Sharpness - Sharpen More
______________________________________________________________________________
Enable Raster 1
28.- Selection - Load Selection from Disk - living_5_mj
29.- Promote Selection to Layer - Layers Arrange - Bring to Top
30.- Eye Candy 5 - Impact - Glass - preset glass_majo
SELECT NONE
31.- Plugin - MuRa's Meister - Copies
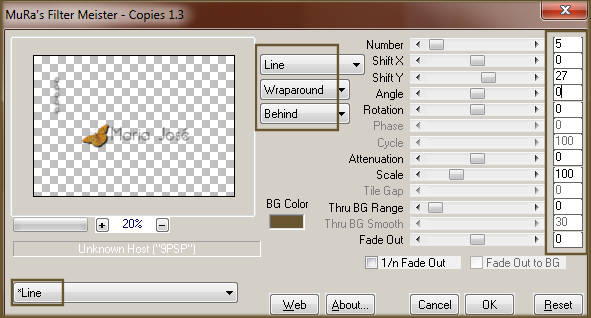
* Layers - Duplicate
32.- Effects - Image Effects - Offset - H 170 - V 0
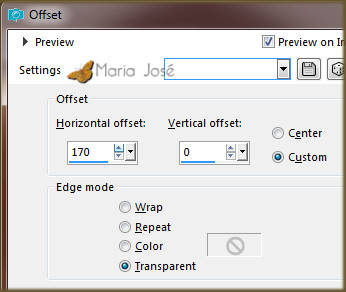
* Layers - Merge Down - 2 times - Drop Shadow 5, 5, 50, 10 black
______________________________________________________________________________
33.- Layers - Add New Layer - Fill with white
34.- Layers - New Mask Layer - mask-Tamer2
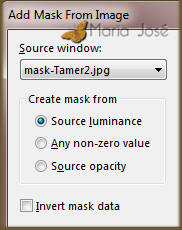
* Layers - Merge Group
35.- Plugin - MuRa's Seamless - Emboss at Alpha
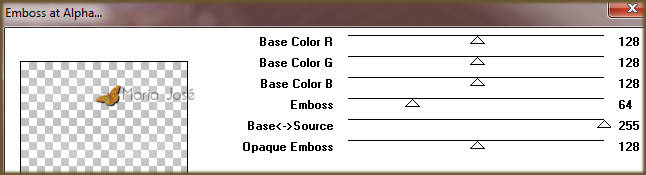
* Layers - Move Down
______________________________________________________________________________
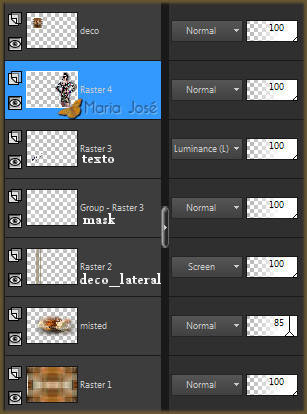
36.- Edit - Copy / Paste as new layer o misted
* Position near right edge - See Model
* Lower the opacity to +/- 85% - If necessary
* Layers - Move Down 2 times
37.- Edit - Copy / Paste as new layer the text - See the Model
* Blend Mode - Luminance (L)
38.- Edit - Copy / Paste as new layer - the character tube
* Position as in model - Drop Shadow - personal criterion
______________________________________________________________________________
LAYERS
Layers - Merge Visible
______________________________________________________________________________
39.- Plugin - AAA Filters - AAA Framer - Same Configuration
40.- Selection - Select All - EDIT COPY
41.- Image - Add Borders - 30px - light color
* Selection Invert - Paste within the selection the copied image
* Adjust - Blur - Gaussian Blur - Radius 15,00
42.- Plugin - AAA Filters - AAA Framer - Same Configuration
* Adjust - Sharpness - Sharpen More - SELECT NONE
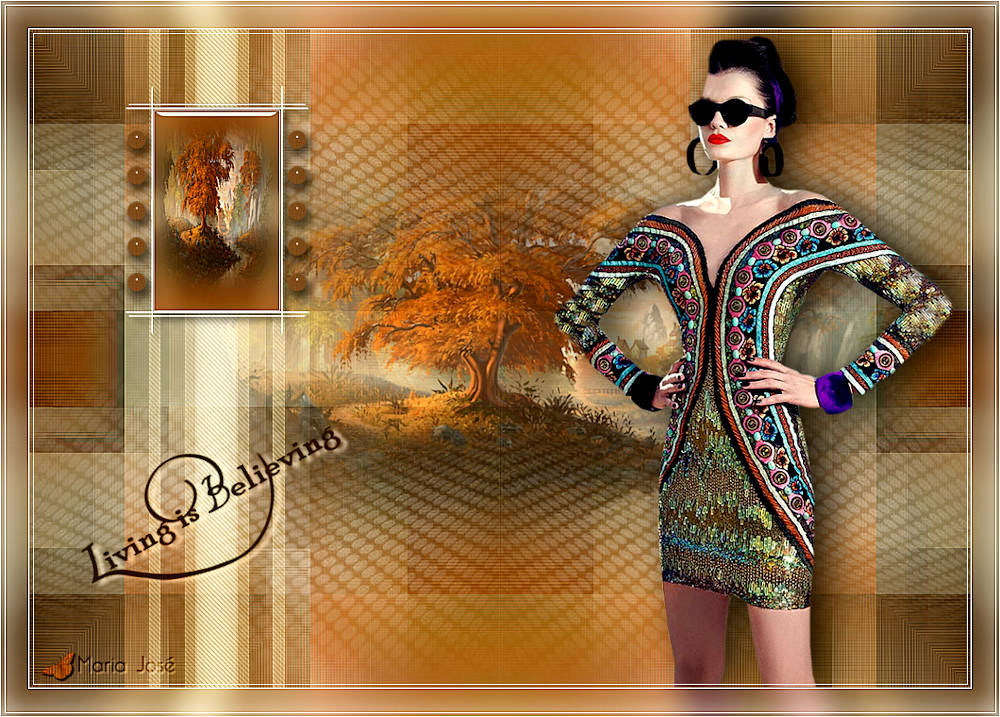
43.- Sign your work - Layers - Merge - Merge All Flatten
44.- Image - Resize - Width 1000px - Save in .jpg
OPTIONAL - Plugin - AAA Filters - Custom - Landscape
I hope you enjoy it, thank you.
______________________________________________________________________________
Another Model


This tutorial was created and published on January 8, 2019 by Maria José Prado. It is protected by copyright law and may not be copied, removed from its place, translated or used in mailing lists without the prior written consent of its author declined above.
VARIANTS