MATERIAL 

*** Seleções - Copiar/Colar dentro da pasta Selections do PSP
PLUGINS
It@lian Editors Effect
Simple
MuRa's Seamless
MuRa's Meister
Carolaine and Sensibility
AP[Lines] SilverLining
AAA Filters - Custom
AAA Frame
___________________________________________________________________________________
Preparar Gradiente - LINEAR - Angle 90 - Repeats 3 - cores a gosto
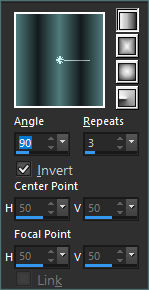
Nossas cores- - Fore #151b1d - back #4f7a7b
___________________________________________________________________________________
1.- Abrir Transparência - 1000x700px - preencher com a gradiente
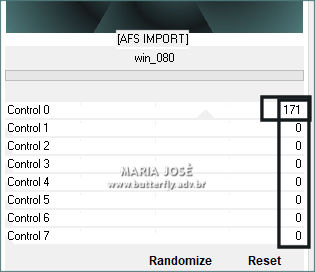
2.- Plugin - [AFS IMPORT] - win_080 - control 0 = 171 - demais itens em 0
3.- Plugin - It@lian Editors Effect - Effetto Fantasma - 15, 15

4.- Effects - Reflection Effects - Rotation Mirror - DEFAULT
5.- Plugin Simple - Top Left Mirrror
6.- Adjust - Sharpness - Sharpen More
7.- Layers - Add New Layer - preencher - cor escura
8.- Layers - Neww Mask Layers - from image - mj_masktamaris
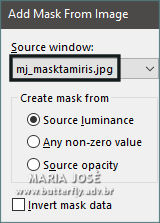
* Layers - Merge Group
9.- Plugin - MuRa's Seamless - Emboss at Alpha - DEFAULT

10.- Edit - Copy Special - Copy Merged - Edit - Paste a New Layer
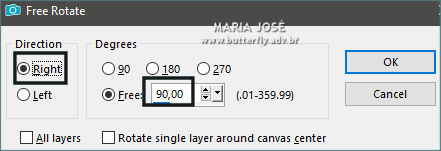
11.- Image - Free Rotate - 90,00 - Right
*Layers Duplicate
12.- Plugin - MuRa's Meister - Perspective Tiling
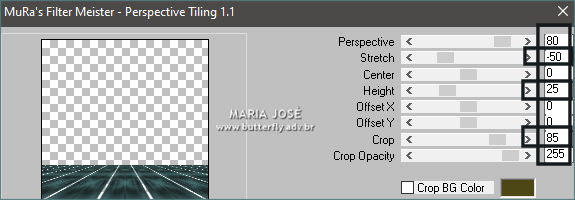
13.- Layers - New Mask Layers - From Image - !!!!.mask.ket-fadesuave-1
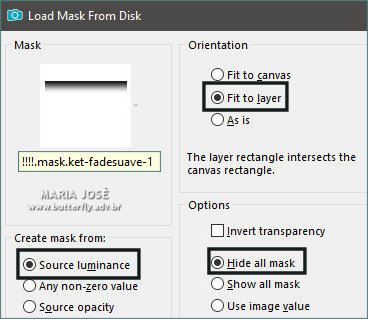
* Layers - Merge Group
ATIVAR A RASTER 2
14.- Plugin - Simple - Left Right Wrap
* Drop Shadow 0, 0, 60, 30, preto
ATIVAR A GROUP - RASTER 2
15.- Selections - Load Selections from disk - tamiris_mj
* Promote Selection to Layer - Layers - Arrange - Bring to Top
SELECT NONE
16.- Plugin - Carolaine and Sensibility - CS-LDots

17.- Plugin - AP[Lines] Lines - SilverLining
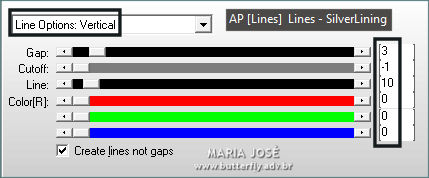
* Adjust - Sharpness - Sharpen More
18.- Effects - Distortion Effects - Wave
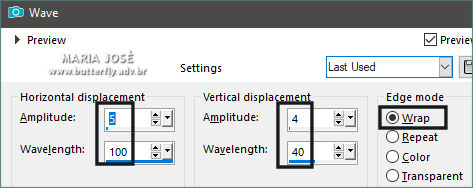
* Blend Mode - Screen
19.- Selections - Load Selection From Disk - tamiris_1_mj
* Add New Layer - Preencher com a cor escura
20.- Selections - Modify - Contract 20 - DELETAR
SELECT NONE
21.- Effects - 3D Effects - Inner Bevel
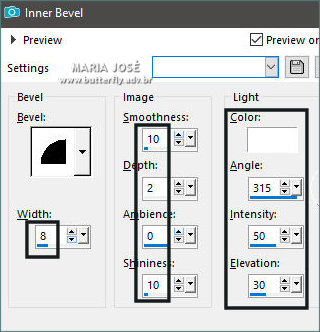
22.- Selections - Load Selection From Disk - tamiris_2_mj
* Layers - Add New Layer - Layer Move Down - Preencher com a cor clara
23.- Edit - Copiar/Colar dentro da seleção o misted
* Layers - Add New Layer
24.- Effects - 3D Effects - Cutout
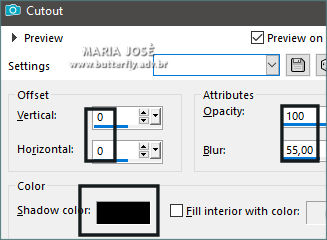
* Ativar a Raster 3 - superior - Layers Merge Down 2 vezes
SELECT NONE
25.- Effects - Geometric Effects - Perspective Horizontal
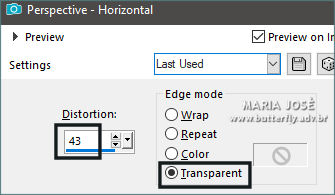
26.- Ferramenta Pick - - Position-
* Tecle M para desativar a ferramenta
27.- Effects - Reflection Effects - Rotating Mirror -Roation 180 - Reflect
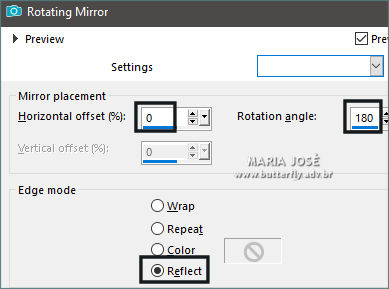
* Drop Shadow como acima
TAG LAYERS - Organizar - Blend Mode e Opacidade de acordo com seu trabalho
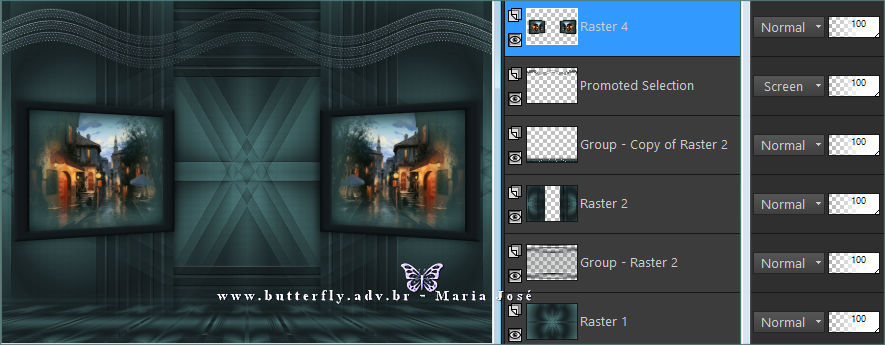
* Layers - Merge Visible
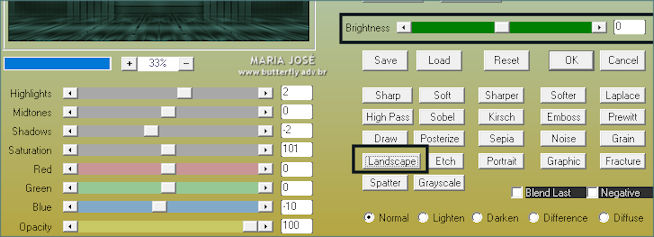
28 - Plugin - AAA Filters - Custom - Landscape
29.- Edit - Copiar/Colar o tube personagem (resize 88%)
* Posicionar - Drop Shadow critério pessoal
BORDERS
30.- Image - Add Borders - 1px - cor escura
31.- Selections - Select All - EDITY COPY
* Image - Add Borders - 50px - branco
32.- Selections - Invert - Colar dentro da seleção a imagem copiada (item 30)
33.- Adjust - Blur - Gaussian Blur - Radius 25,00
*** REPETIR OS ITENS 16 e 17 (Carolaine e AP[Lines])
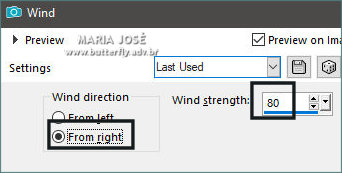
34.- Effects - Distortions Effects - Wind
35.- Effects - Reflection Effects - Rotating Mirror -Rotation 180 - Reflect
36.- Plugin Simple - Top Left Mirror
37.- Drop Shadow 0, 0, 80, 40, preto - Selections Invert - Repetir o Drop Shadow
SELECT NONE
38.- Plugin - AAA Frame - Foto Frame (30, 50)
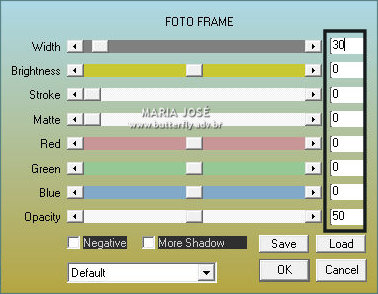
* Repetir item anterior (20, 50)
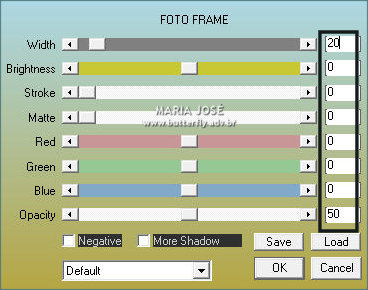
39.- Assinar o trabalho - Imagem Add Borders - 1px cor escura
40.- As layers já estão mergida - Image Resize - Width 1000px- Salvar em .jpg
Espero que apreciem, obrigada.
___________________________________________________________________________________
Outro Modelo
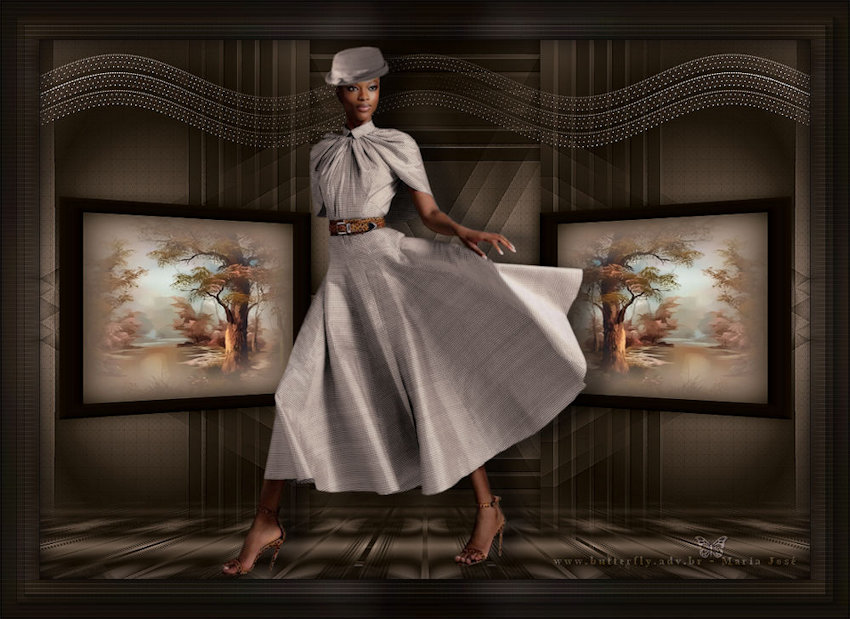

Este tutorial foi criado em 26 de abril de 2021 por Maria José Prado. É protegido por lei de Copyright e não poderá ser copiado, retirado de seu lugar, traduzido ou utilizado em listas de discussão sem o consentimento prévio e escrito de sua autora acima declinada.
VARIANTES
