MATERIAL 
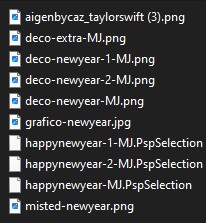
Tubes personagem by Caz, agradeço
Demais imagens Pinterest - Remove tube MJ
*** Seleções - Copiar/Colar dentro da Pasta Selections do PSP
PLUGINS
Medhi 2
VanDerLee - Unplugged-X
Filter Factory Gallery B
Simple
Sketch
MuRa's Meister
___________________________________________________________________________________________
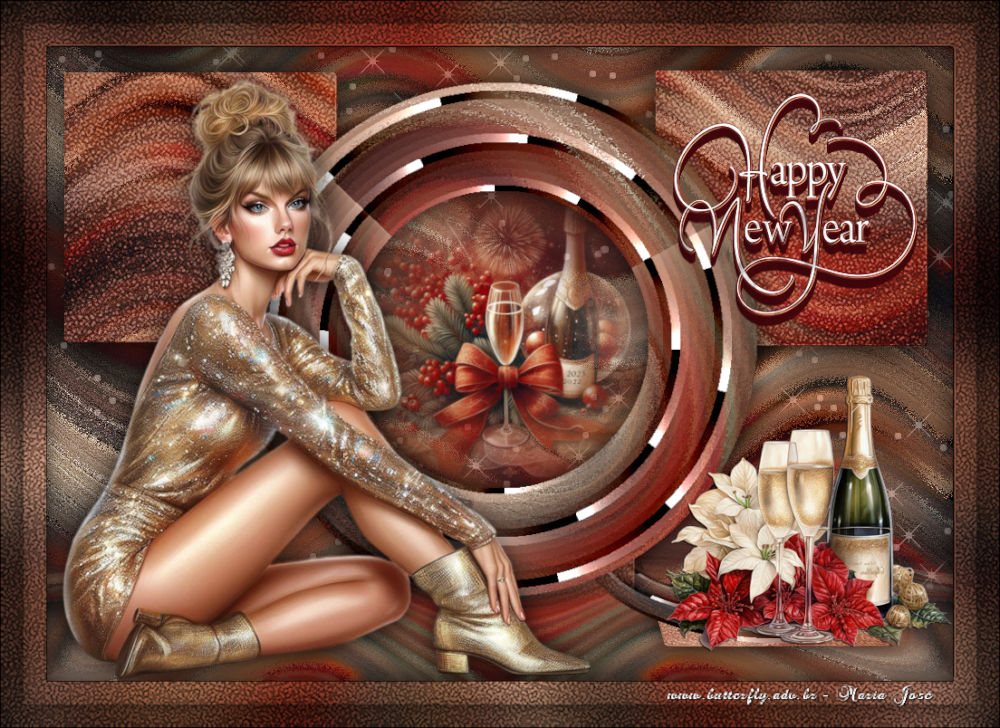
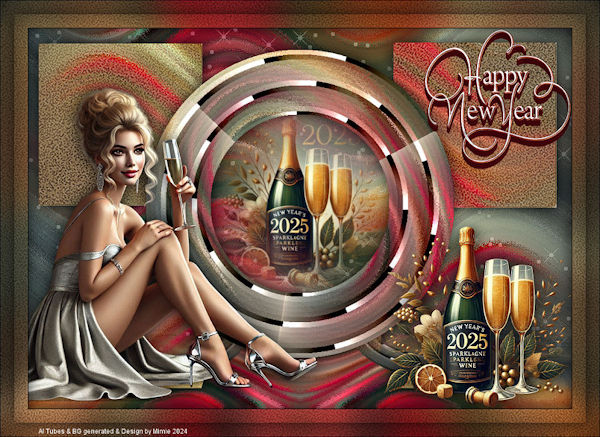
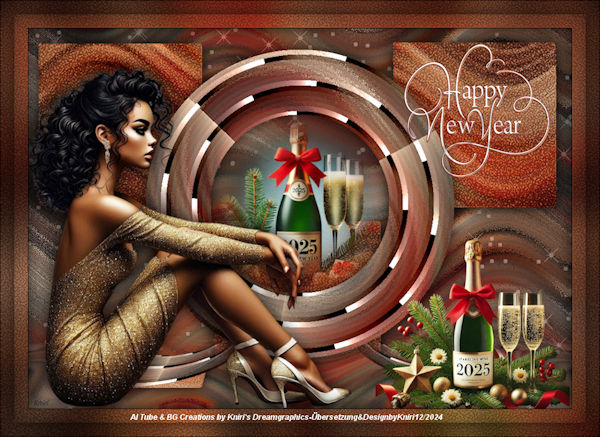
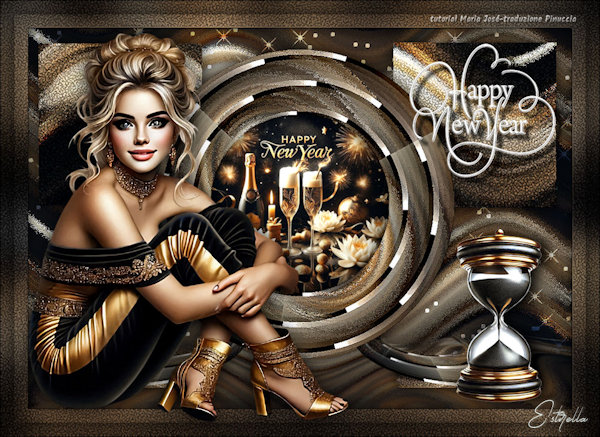
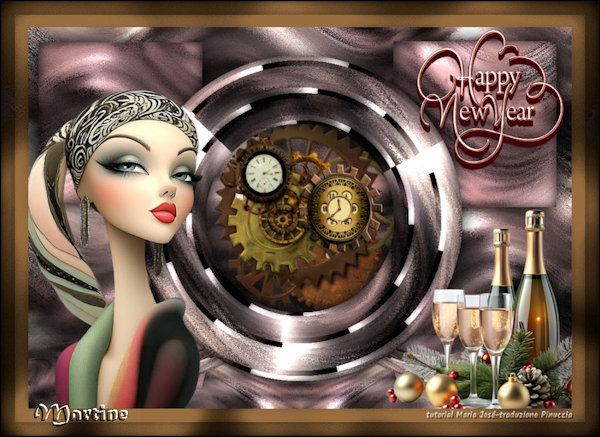
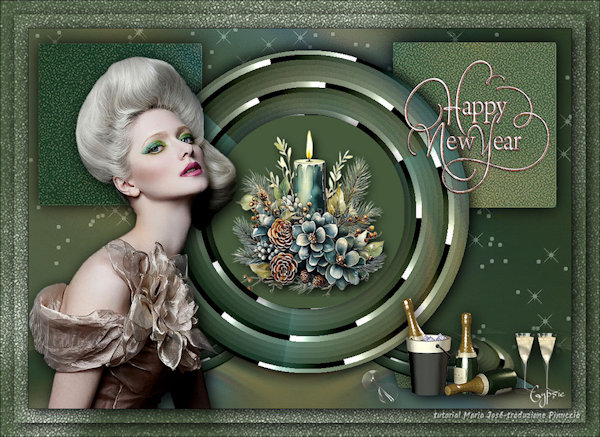
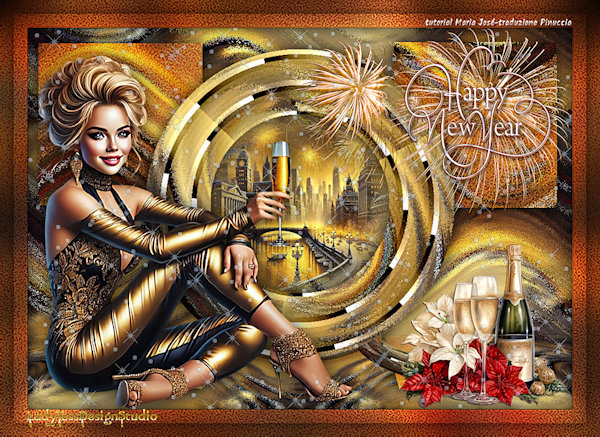
Abrir o gráfico-newyear ou outro de sua escolha - EDIT COPY - Minimizar
1.- Abrir nova imagem - Transparente - 1000x700px - Selections - Select All
2.- Colar dentro da seleção a imagem acima copiada
SELECT NONE
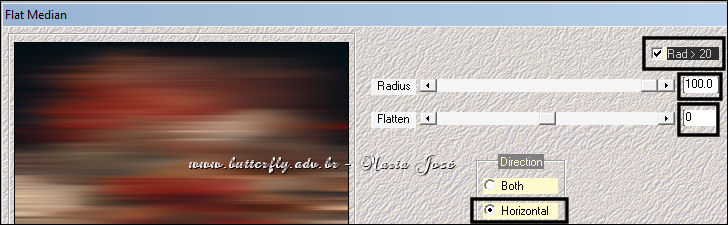
3.- Plugin - Medhi 2 - Flat Median
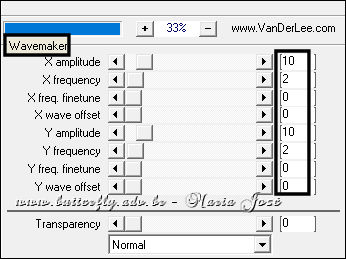
4.- Plugin - VanDerLee - Unplugged-X - Wavemaker - DEFAULT
5.- Effects - Image Effects - Seamless Tiling - CORNER - VERTICAL - Transition 100
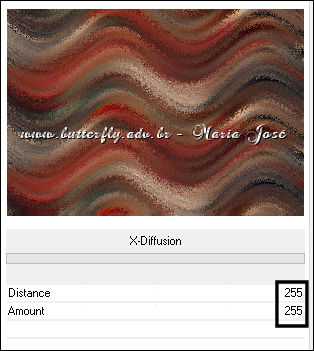
6.- Plugin - Filter Factory Gallery B - X-Diffusion - 255, 255
* Adjust - Sharpness - Sharpen
___________________________________________________________________________________________
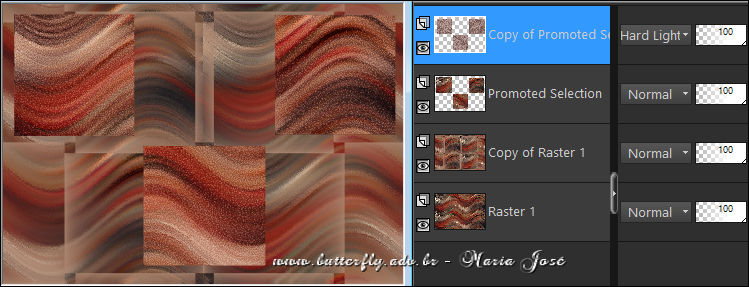
* Layers - Duplicate
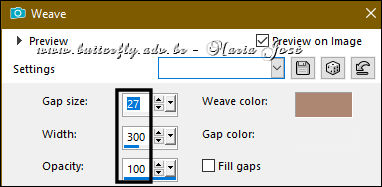
7.- Effects - Texture Effects - Weave - Fill Gaps DESCLICADO
8.- Plugin - Simple - Left Right Wrap
ATIVAR A RASTER 1
9.- Selections - Load Selection From Disk - happynewyear-MJ
10.- Promote Selection to Layer - Layers - Arrange - Bring to Top
SELECT NONE - Layers - DUPLICATE
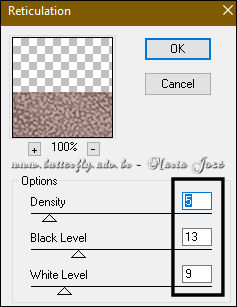
11.- Plugin - Sketch - Reticulation
* Blend Mode - Hard Light ou outro
* Layers - Merge Down - Drop Shadow 0, 0, 100, 50, preto - Image - Mirror - Mirror Horizontal
___________________________________________________________________________________________
ATIVAR A COPY OF RASTER 1
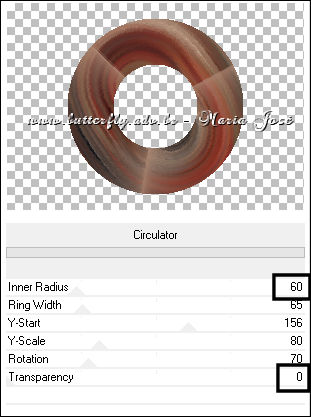
12.- Plugin - Filter Factory Gallery B - Circulator
* Layers - Arrange - Bring to Top
13.- Selections - Load Selection From Disk - happynewyear-1-MJ
DELETAR - SELECT NONE
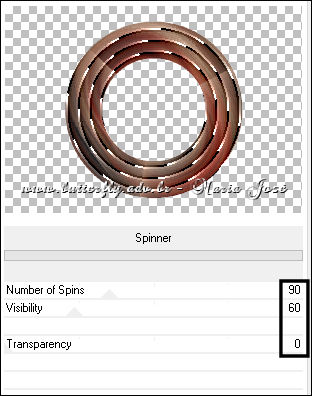
14.- Plugin - Filter Factory Gallery B - Spinner
___________________________________________________________________________________________
15.- Edit - Edit Copy Special - COPY MERGED
* Edit - Paste as New Layer
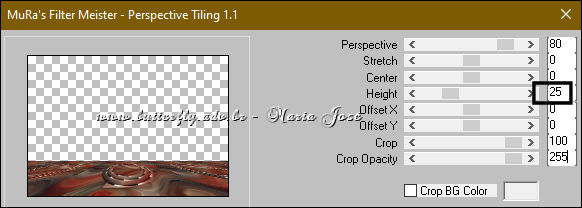
16.- Plugin - MuRa's Meister - Perspective Tiling (25)
17.- Ferramenta Magic Wand - Tolerância 0 - Feather 90 - Selecionar a Transparência
* DELETAR +/- 10 VEZES - SELECT NONE
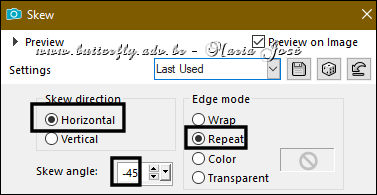
18.- Effects - Geometric Effects - Skew
19.- Effects - Reflection Effects - Rotating Mirror - DEFAULT
* Layers - Arrange - Move Down
___________________________________________________________________________________________
* ATIVAR A PROMOTED SELECTION
20.- Selections - Load Selection From Disk - happynewyear-2-MJ
DELETAR - MANTER A SELEÇÃO
21.- Layers - Add New Layer - Edit - Copiar/Colar dentro da seleção o misted
SELECT NONE - Layers - Arrange - Move Up
22.- Ativar a Copy of Raster 1 - Drop Shadow 0, 0, 80, 40, preto
* Layers - Merge Down
23.- Image - Resize -95%- All Layers - DESCLICADO
24.- Ferramenta PICK - Tecle K para Ativar - Position X 187,00 - Position Y 10,00
* Tecle M para desativar
___________________________________________________________________________________________
SE POSICIONAR NA RASTER 1
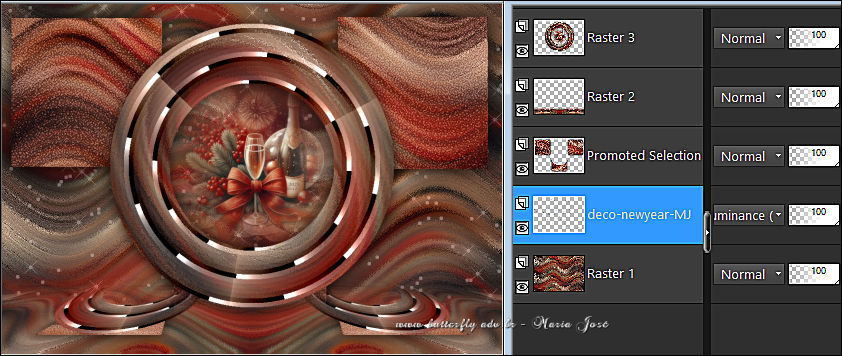
25.- Edit - Copiar/Colar como nova Layer - deco-new-year-MJ
* Blend Mode - Luminance (L)
TAG LAYERS - ORGANIZAR - Blend Mode e Opacidade de acordo com seu trabalho
___________________________________________________________________________________________
26.- Edit - Copiar/Colar como nova Layer - texto-extra-MJ - Layers - Arrange - Bring to Top - Posicionar
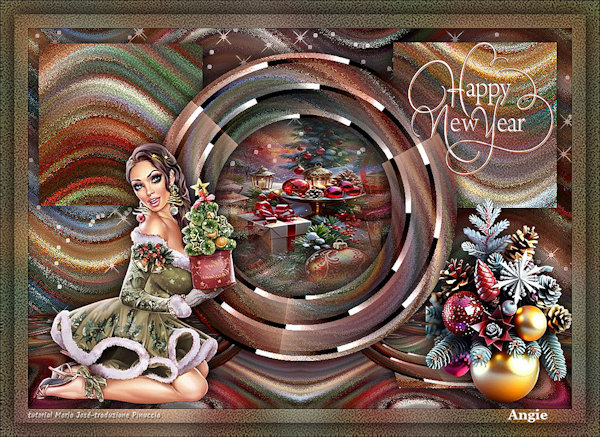
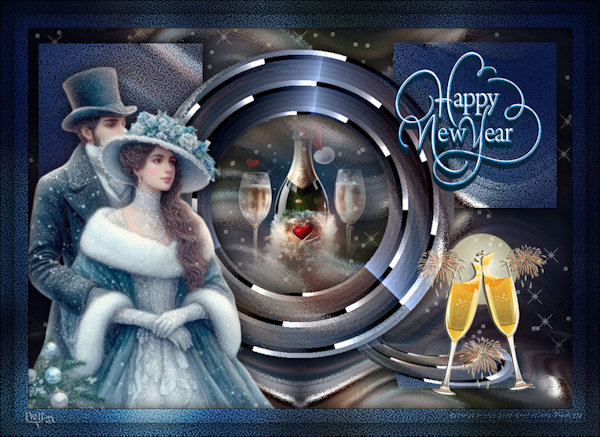
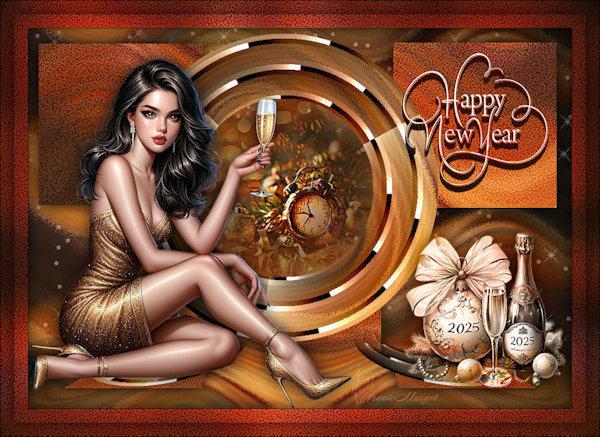
* Ver Modelo
27.- Edit - Copiar/Colar como nova Layer - deco-new-year-2-MJ - Posicionar
* Ver Modelo
28.- Edit - Copiar/Colar como nova Layer o tube personagem - Resize 65% - All Layers DESCLICADO
* Drop Shadow - critério pessoal
___________________________________________________________________________________________
BORDAS
29.- Image - Add Borders - 1px - preto - Selections - Select All - EDIT COPY
* Image Add Borders - 50px - branco
30.- Selections - Invert - Colar dentro da seleção a imagem copiada no item 29
31.- Adjust - Blur - Gaussian Blur - Radius 30,00
* Promote Selection to Layer
32.- Plugin - Sketch - Reticulation - mesma configuração
* Blend Mode - Overlay ou outro
* Layers - Merge Down - Drop Shadow 0, 0, 80, 40, preto
33.- Selections - Select All - Modify - Contract 25
* Drop Shadow 0, 0, 80, 40, preto
SELECT NONE
___________________________________________________________________________________________
34.- Assinar o trabalho - Image Add Borders - 1px - preto
35.- As layers estão mergidas - Image Resize - Width 1000px - All Layers CLICADO
* Salvar em .jpg
Espero que apreciem, obrigada.
___________________________________________________________________________________________
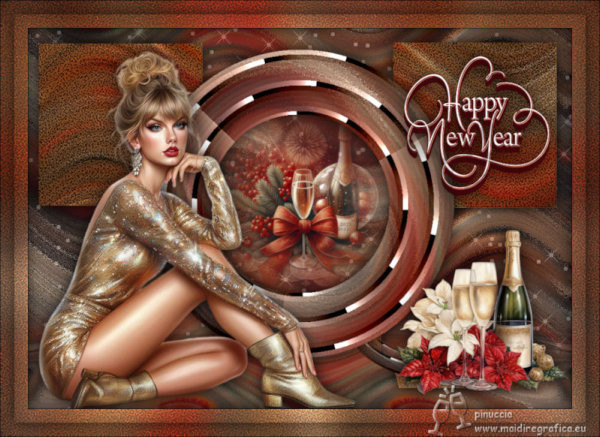
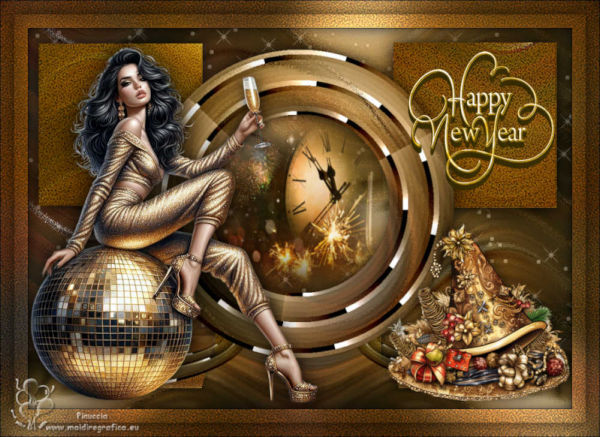
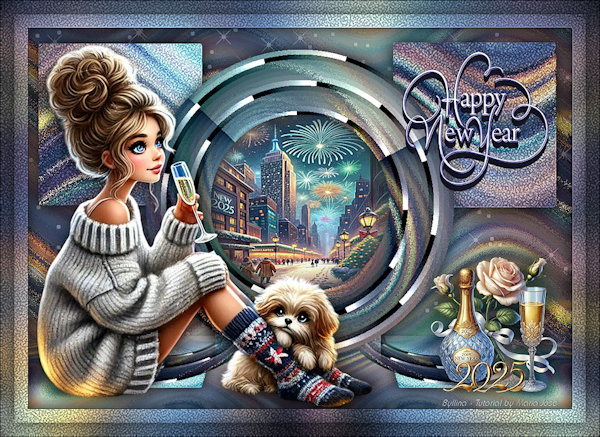
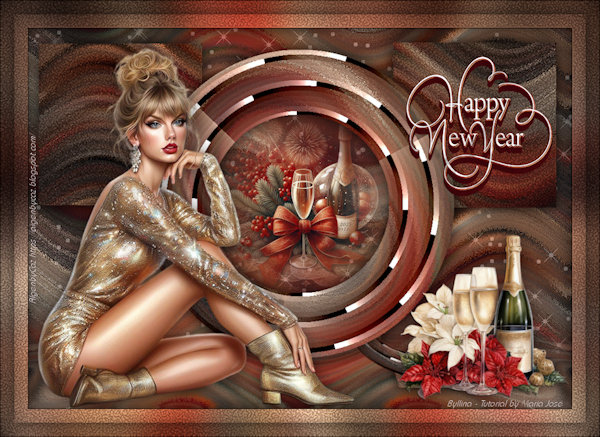
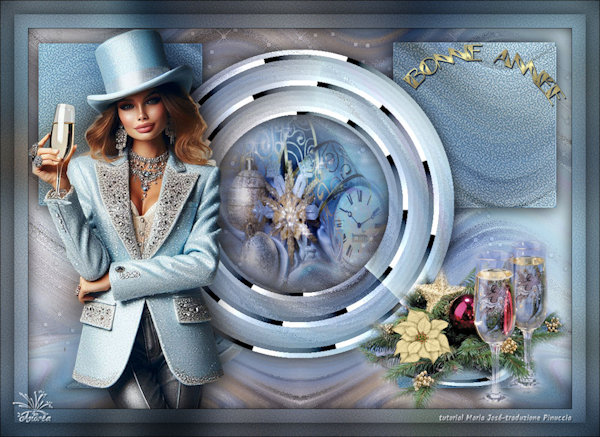
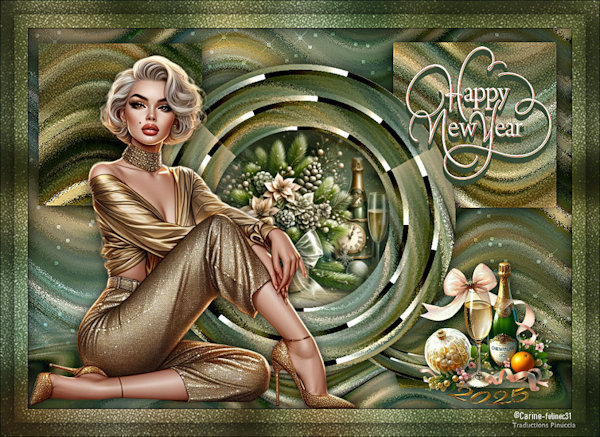
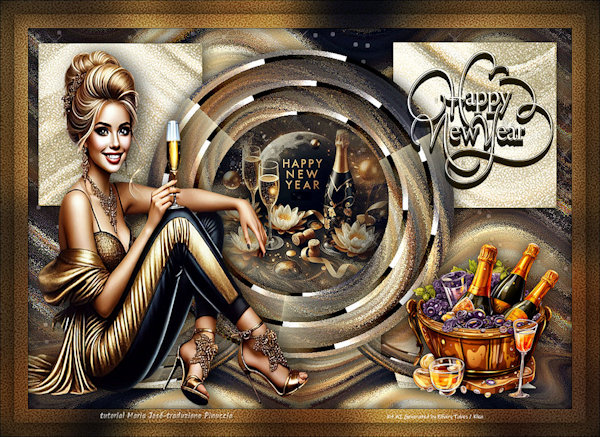
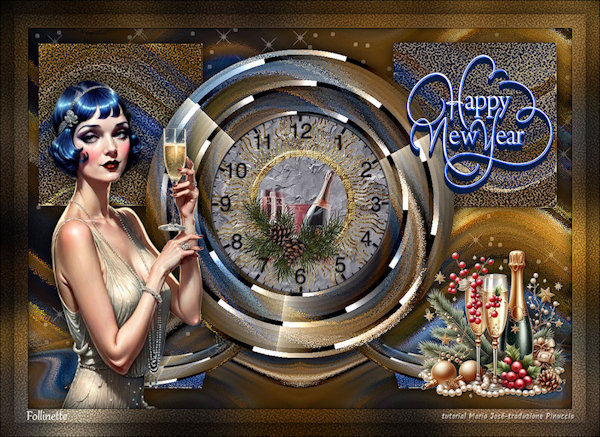
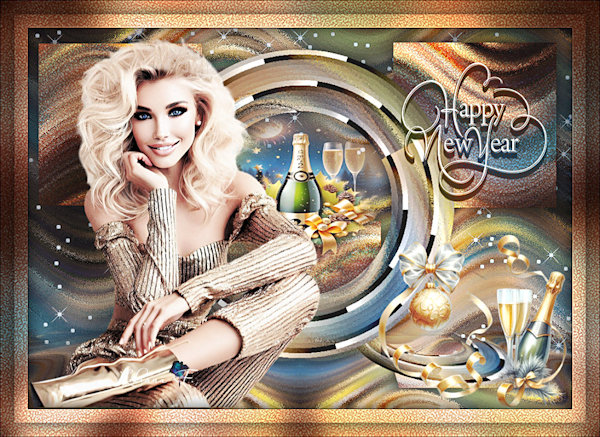
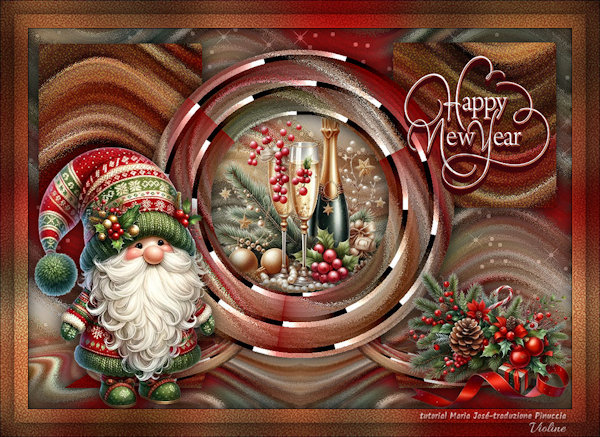
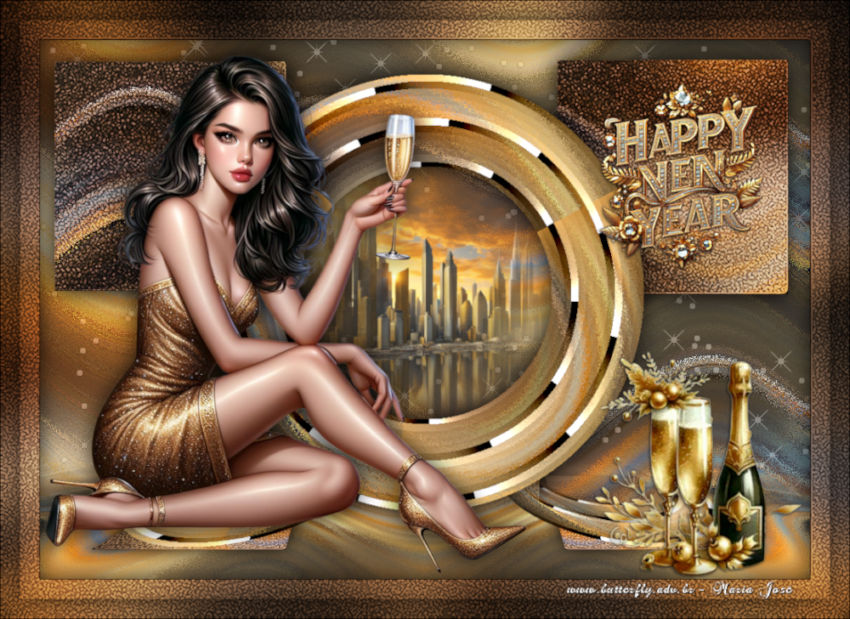
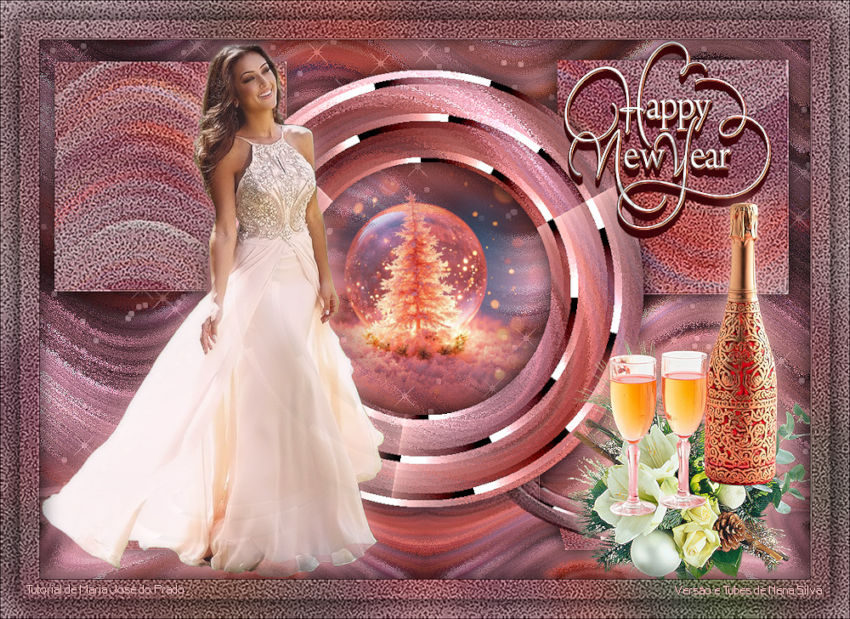
Outro Modelo
Agradeço a amiga NENA SILVA que gentilmente corrigiu e testou para mim

Este tutorial foi criado em dezembro de 2024 por Maria José do Prado. É protegido pela lei de Copyright e não poderá ser copiado,
retirado de seu lugar, traduzido ou utilizado em listas de discussão sem o consentimento prévio e escrito de sua autora acima declinada.