1.- Escolher duas cores a seu gosto
Cores deste tutorial - Foreground #cfb2ac- - Background #35231f-
________________________________________________________________________________________________
2.- Abrir transparência - 1000x700px
3.- Plugin - Mehdi - Wavy Lab

4.- Adjust - Blur - Gaussian Blur - Radius 30,00
________________________________________________________________________________________________
5.- Plugin - Mehdi - Sorting Tiles

6.- Plugin - Graphics Plus - Quick Tile 1 - 128, 128, 128

7.- Plugin - Simple - Pizza Slice Mirror
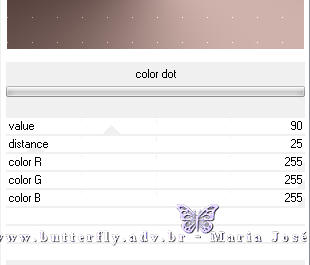
8.- Plugin - Penta - color dot - 90, 25, 255, 255, 255
9.- Adjust - Sharpness - Sharpen More
________________________________________________________________________________________________
10.- Slections - Load Selection from Disk - beauty_mj
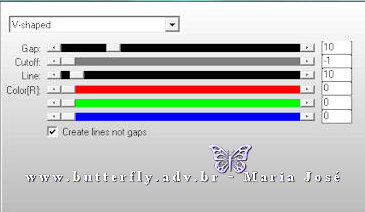
11.- Plugin - AP[Lines] SilverLining - V-shaped
12.- Plugin - Carolaine and Sensibility - CS-LDots

13.- Effects - 3DEffects - Drop Shadow - 0, 0, 50, 50, preto
DESELECIONAR
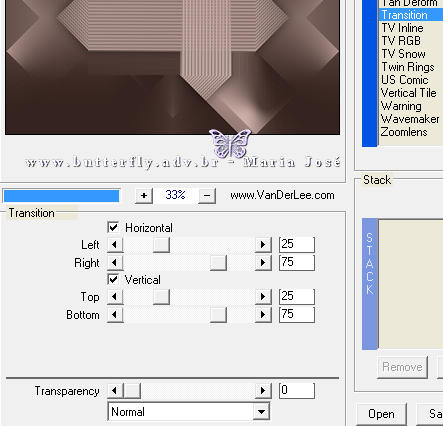
14.- Plugin - VanDerLee - Unplugged-X - Transition
________________________________________________________________________________________________
15.- Layers - Add New Layer - preencher com a cor clara - Opacidade 80%
16.- Layers - New Mask Layer - From Image - LF-Mask37-0112013

Layers - Merge Group
________________________________________________________________________________________________
17.- Plugin - Carolaine and Sensibility - CS-LDots - mesma configuração
18.- Plugin - MuR'as Seamless - Emboss Alpha - DEFAULT

19.- Layers - Duplicate - Image Mirror
________________________________________________________________________________________________
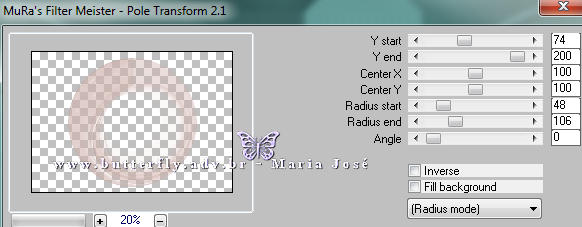
20.- Plugin - MuR'as Meister - Pole Transform
21.- Image - Resize 85% - All Layers DESCLICADO
22.- Effects - Image Effects - Offset - (-215), 65

23.- Effects - 3DEffects - Drop Shadow - 0, 0, 50, 50, preto
Blend Mode - Screen ou outro a seu gosto
________________________________________________________________________________________________
24.- Edit - Copiar/Colar tube texto1 - Ajustar como no modelo
Blend Mode - Multiply ou outro
________________________________________________________________________________________________
25.- Edit - Copiar/Colar tube principal - ver modelo
26.- Effects - 3DEffects - Drop Shadow - 0, 0, 50, 50, preto
________________________________________________________________________________________________
LAYERS
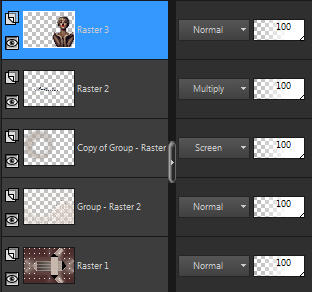
Layers Merge Visible
________________________________________________________________________________________________
27.- Image - Add Borders - 1px - cor escura
Image - Add Borders - 1px - cor clara
28.- Selections - Select All - Edit COPY
29.- Image - Add Borders - 40px - cor escura
________________________________________________________________________________________________
30.- Selections - Invert - Selections - Modify - Contract 2px
31.- Edit - Colar dentro da seleção a image copiada (item27)
32.- Adjust - Blur - Gaussian Blur - Radius 30,00
33.- Plugin - AP[Lines] SilverLining - V-shaped - mesma configuração
34.- Effects - 3DEffects - Drop Shadow - 0, 0, 50, 50, preto
35.- Selections - Invert - Repetir o Drop Shadow (item 33)
DESELECIONAR
________________________________________________________________________________________________
36.- Assinar o trabalho - Layers - Merge All Flatten
FACULTATIVO - Plugin - AAAFilters - Custom - Landscape
37.- Image - Resize - Width 100px - Salvar em .jpg
Espero que apreciem, obrigada.
________________________________________________________________________________________________
Outro Modelo
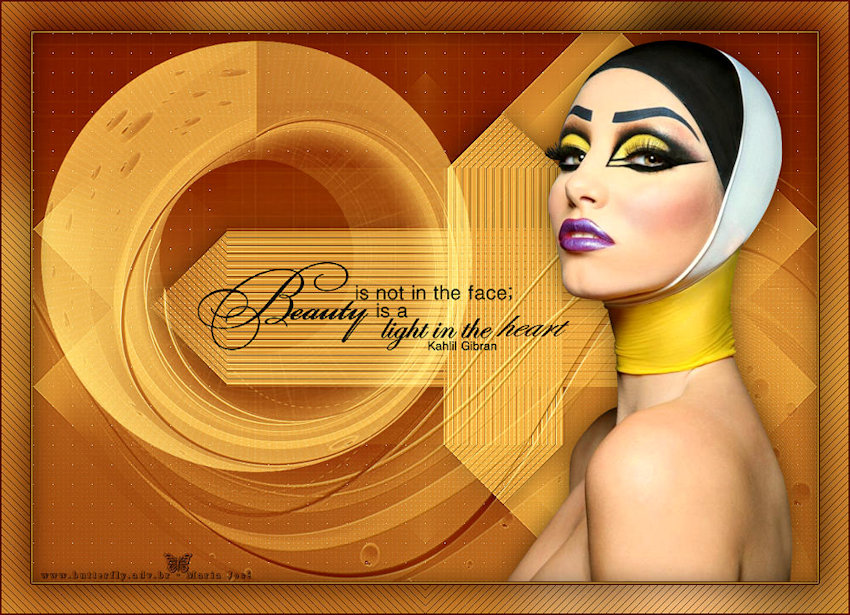


Este tutorial foi criado em 25 de setembro de 2017 por Maria José Prado. É protegido por lei de Copyright e não poderá ser copiado, retirado de seu lugar, traduzido ou utilizado em listas de discussão sem o consentimento prévio e escrito de sua autora acima declinada.
VARIANTES
